Administration Module
The Administration module in BINU ERP is designed to manage system users, their roles, and permissions. It also controls which products and categories appear in the sales interface through the Sales Chain tab. By using this module, administrators ensure secure, role-based access to ERP functionalities and maintain clean configuration of sales-related product visibility.
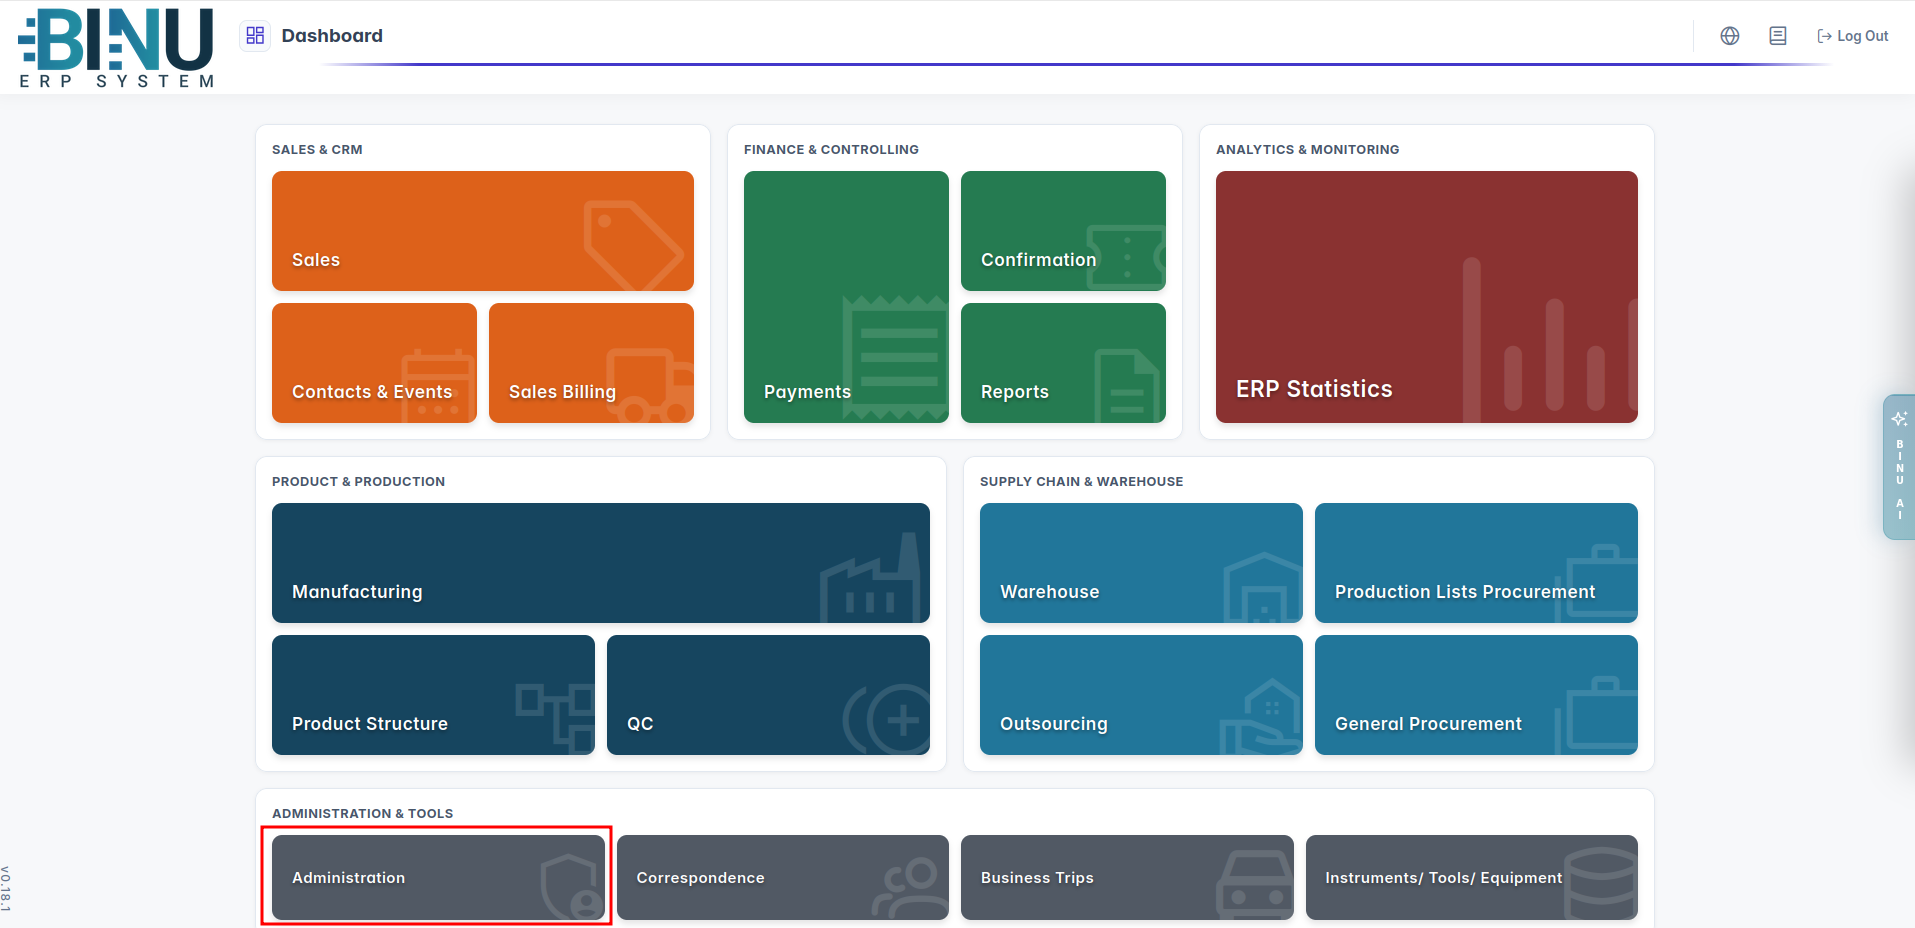
The module is divided into five main tabs in the top header:

- Identity Management – has three sub-tabs where you can create and manage Employees, Roles & Permissions, and Organization Structure.

- Google Account – manage synchronization between the events entered into ERP and the Google Calendar.
- Sales Chain – configure which product categories and items are visible in Sales Chain.
- Warehouse Excel Import – fill the warehouse(s) with an import from an Excel file.
- Conference Rooms – add conference rooms that can later be used for reservation purposes.
The BINU ERP Guide and AI Assistant Tools
The BINU ERP Guide and AI Assistant Tools
The BINU ERP system provides tools to support users in navigating and understanding the processes and functionalities of the system. These tools — the BINU ERP Guide and the BINU AI Assistant — include a built-in contextual help. They are non-intrusive and can be closed or reopened as needed, allowing users to remain focused on their current workflow without interruption.
When you click the BINU ERP Guide icon in the upper-right corner of the screen, the pop-up guide window opens. This feature is available across different modules and is designed to help users understand where they are in the system and how to use the current section effectively.

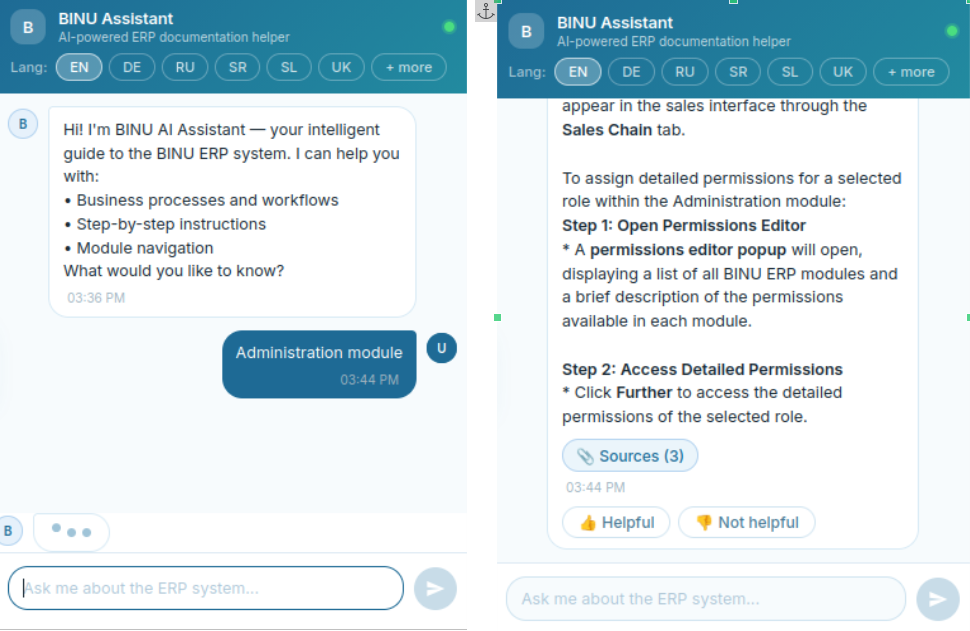
When you click the BINU AI feature on the side of the screen, the chat window opens, where users can choose their language of conversation. The supported languages are: English, Bulgarian, Croatian, French, German, Hungarian, Italian, Romanian, Russian, Serbian, Slovenian, Spanish, Turkish, and Ukrainian.

The BINU ERP Guide: Quick Overview
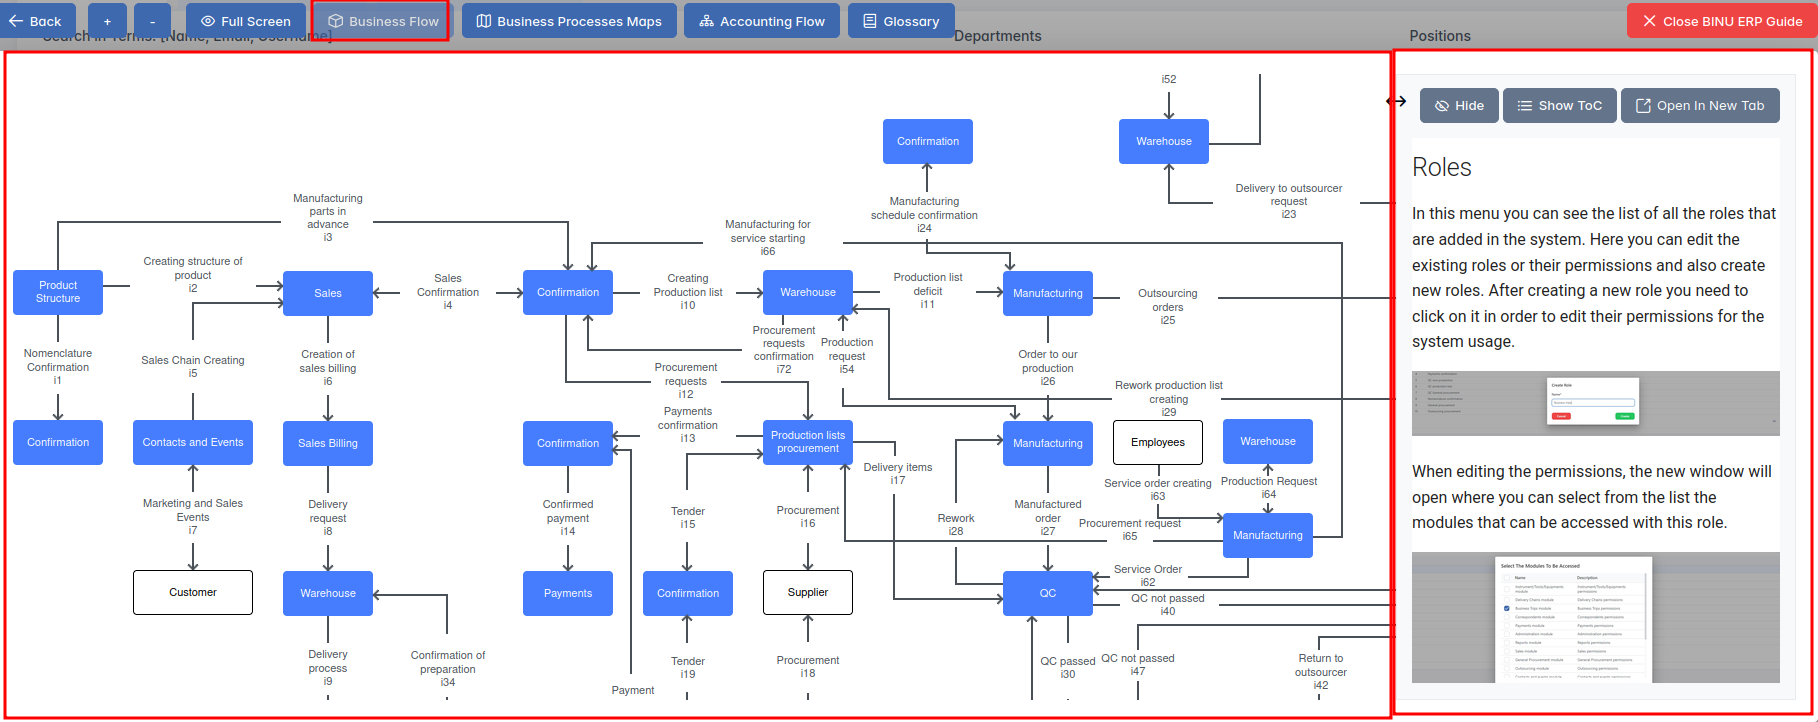
When you click the BINU ERP Guide book icon, you land on the Business Flow map. It has two main sections: the left panel displaying the business flow map and the right panel showing the functional overview.
- Left panel — Business Flow Map — displays a visual diagram of the business processes. It shows how each module is interconnected; for example, you can see how Sales, Manufacturing, Procurement, CRM, QC, and Warehouse are interconnected.
- Right panel — Functional Overview — provides a concise, bullet-style instruction list describing the key operations available in the current module/tab.
Top Bar Options
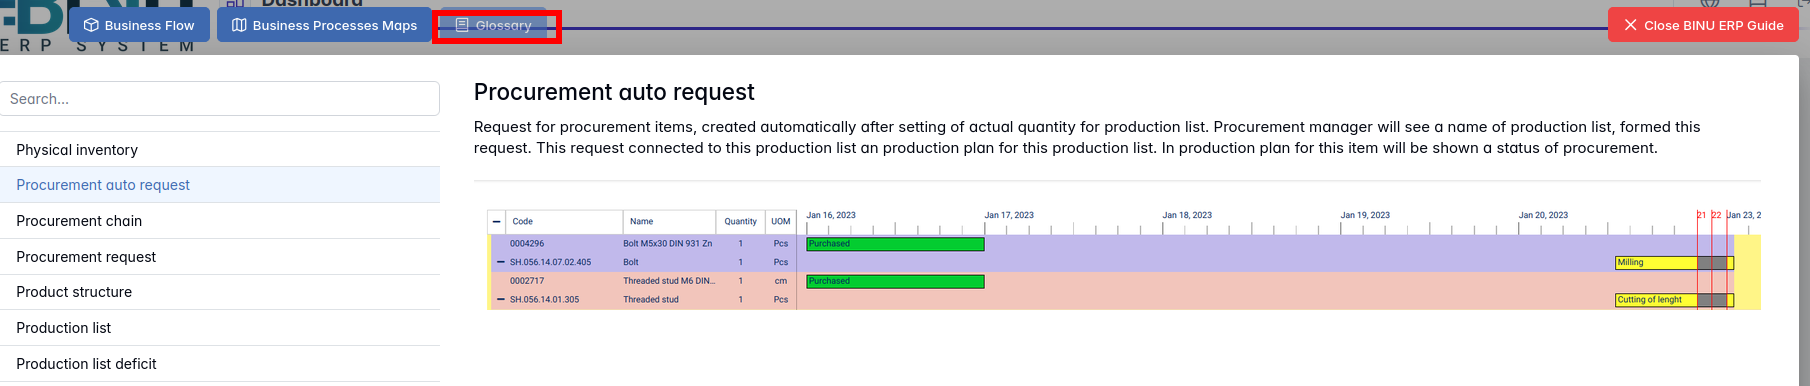
At the top of the ERP Guide window, you'll find optional tools for deeper understanding: Business Processes Maps, Accounting Flow, and Glossary. The Accounting Flow is meant for financial departments.

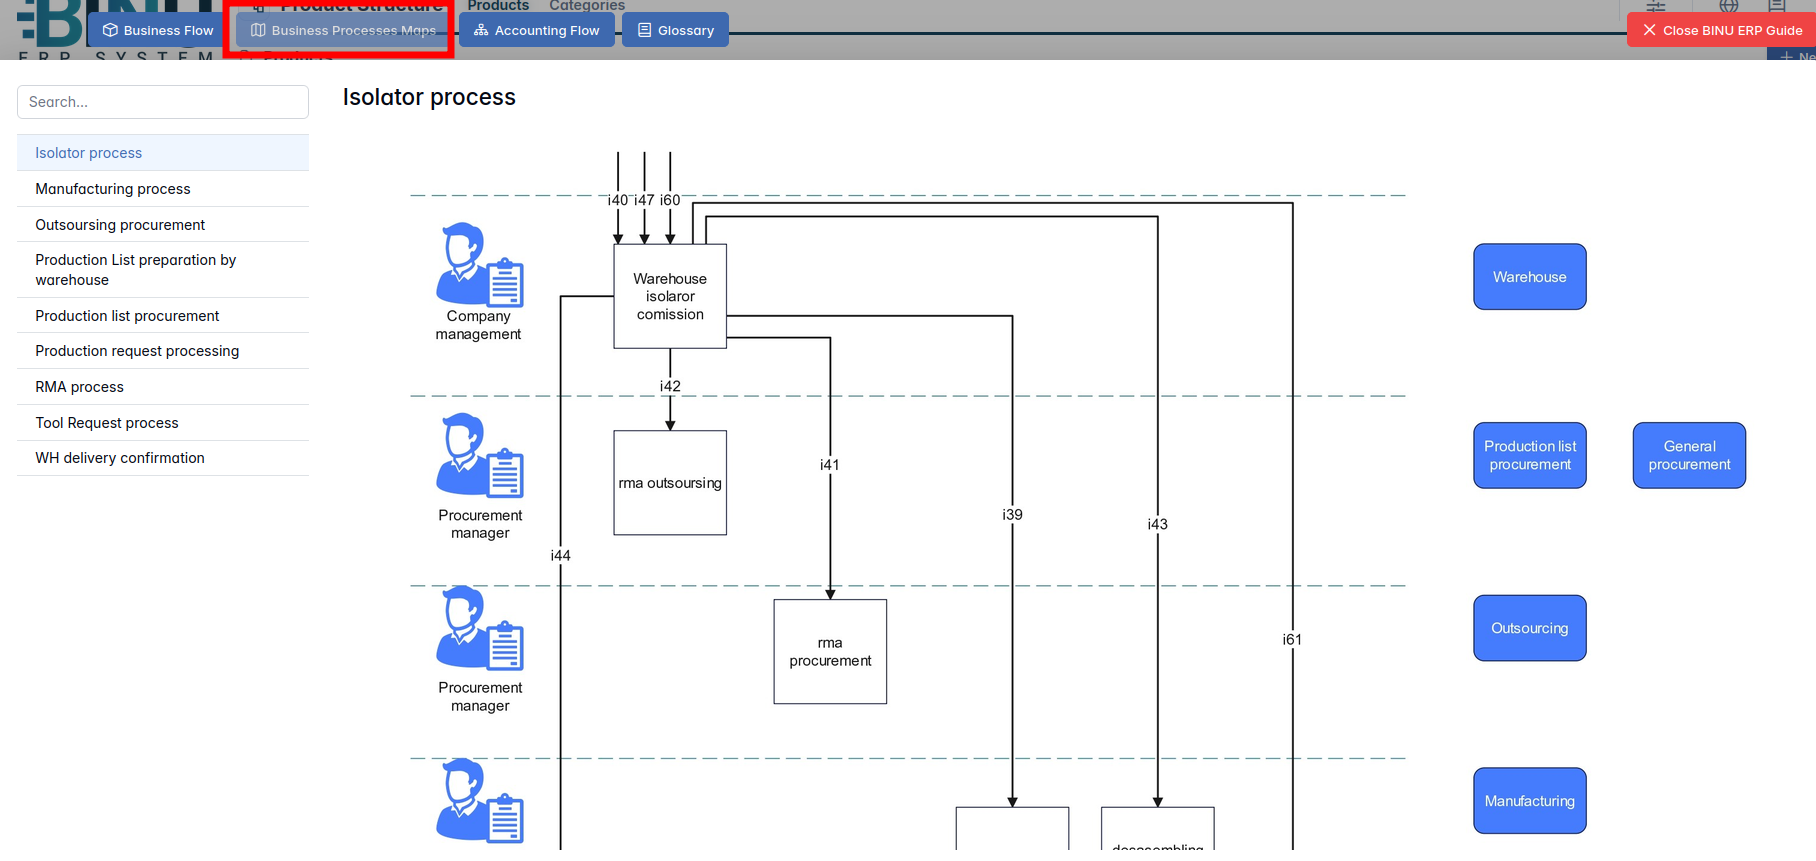
Business Processes Maps
Business Processes Maps provides a visual representation of the company's operational structure and business flow. It helps the user understand how the current module fits into the larger operational structure and makes it easy to grasp the upstream and downstream dependencies within the business processes. The Business Processes Maps can be accessed from various modules.
Accounting Flow: Data Flow Graph and Responsibility Matrix
Accounting Flow is a tool designed for the finance department; it shows where the data originates and defines responsibilities. For this purpose, it consists of two parts: a Data Flow Graph and a Responsibility Matrix.
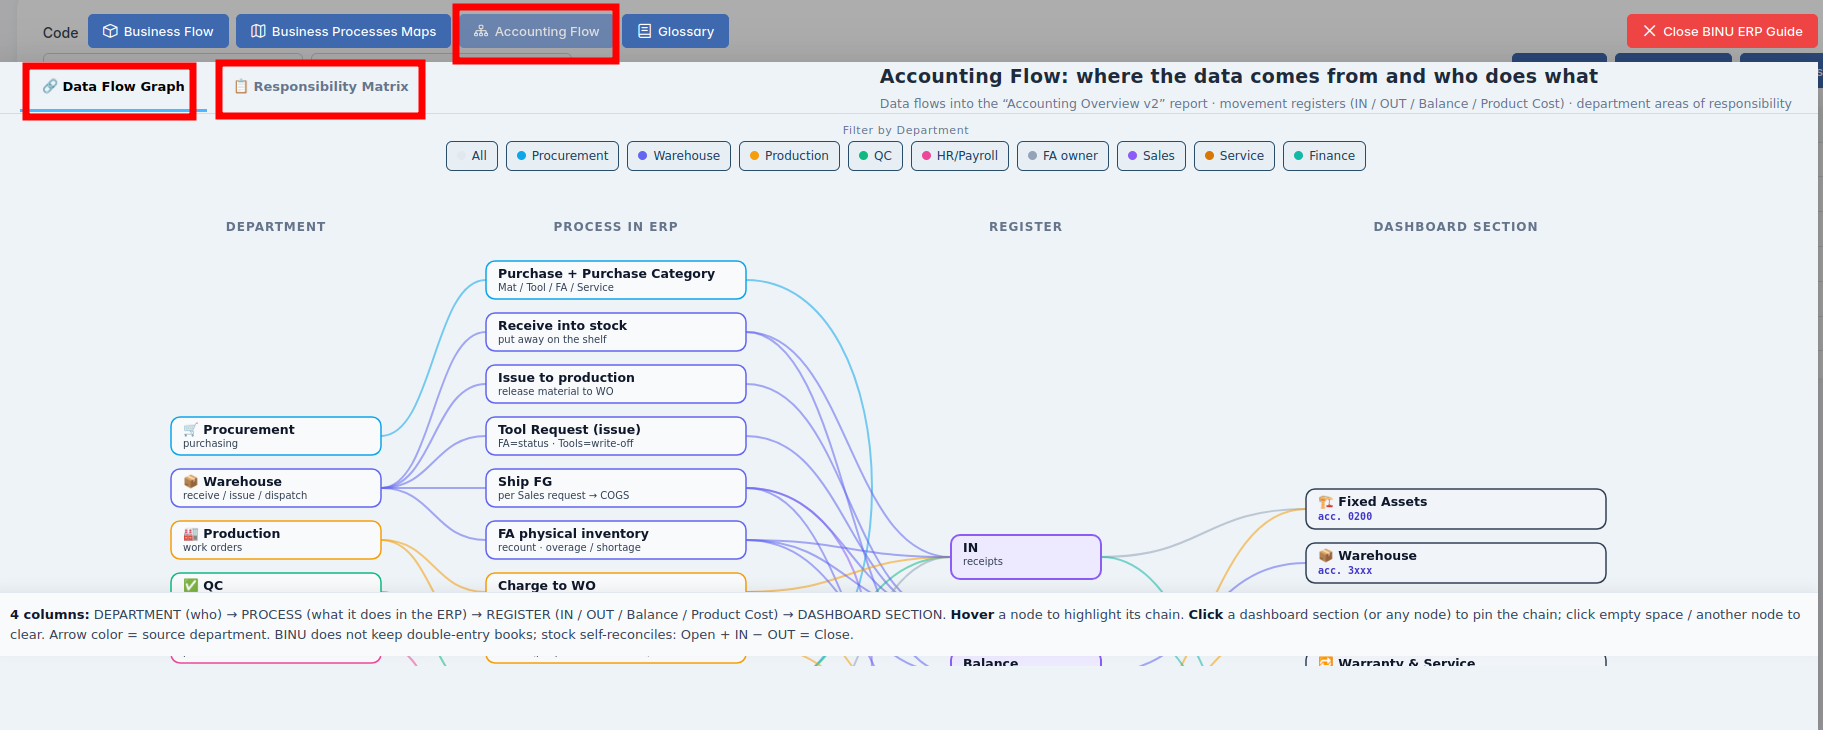
The Data Flow Graph displays the movement of items from departments to the warehouse and from the warehouse to the departments. Based on these movements, the system tracks the flow of goods entering and leaving the company. The Dashboard section, planned for a future release, will allow users to view real-time data (in, out, balance, product costs).
If you hover over a diagram block, the system highlights the corresponding movement chain.
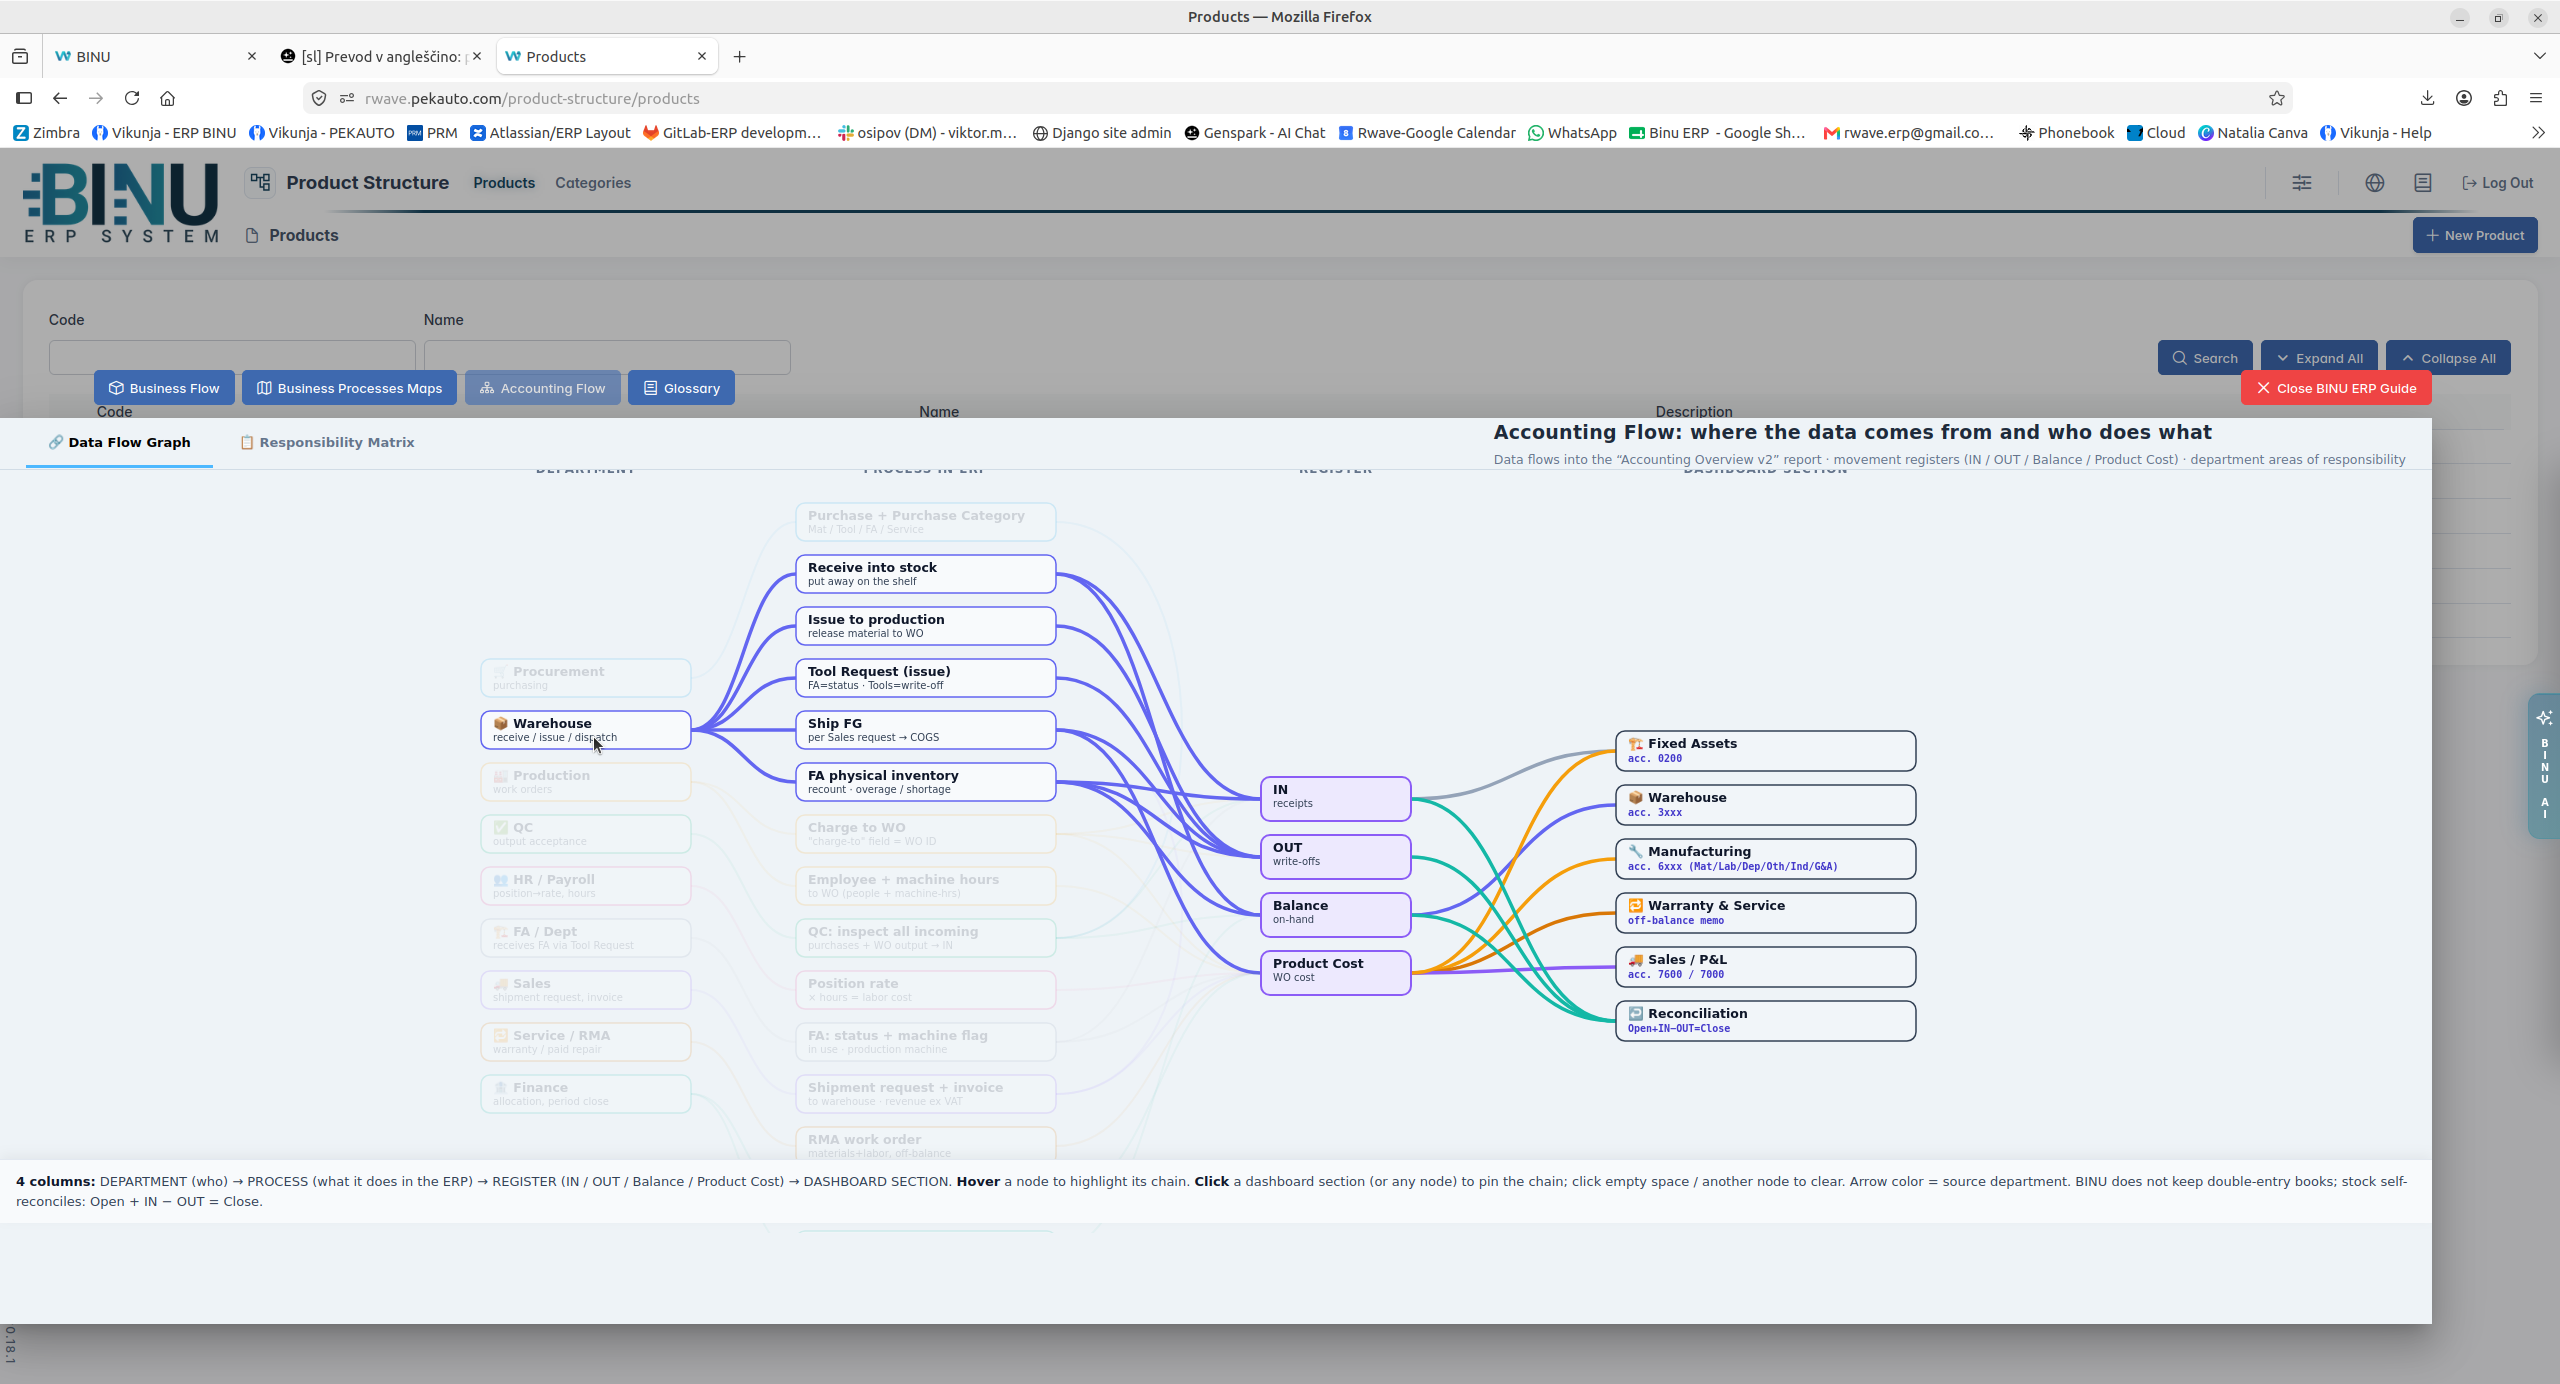
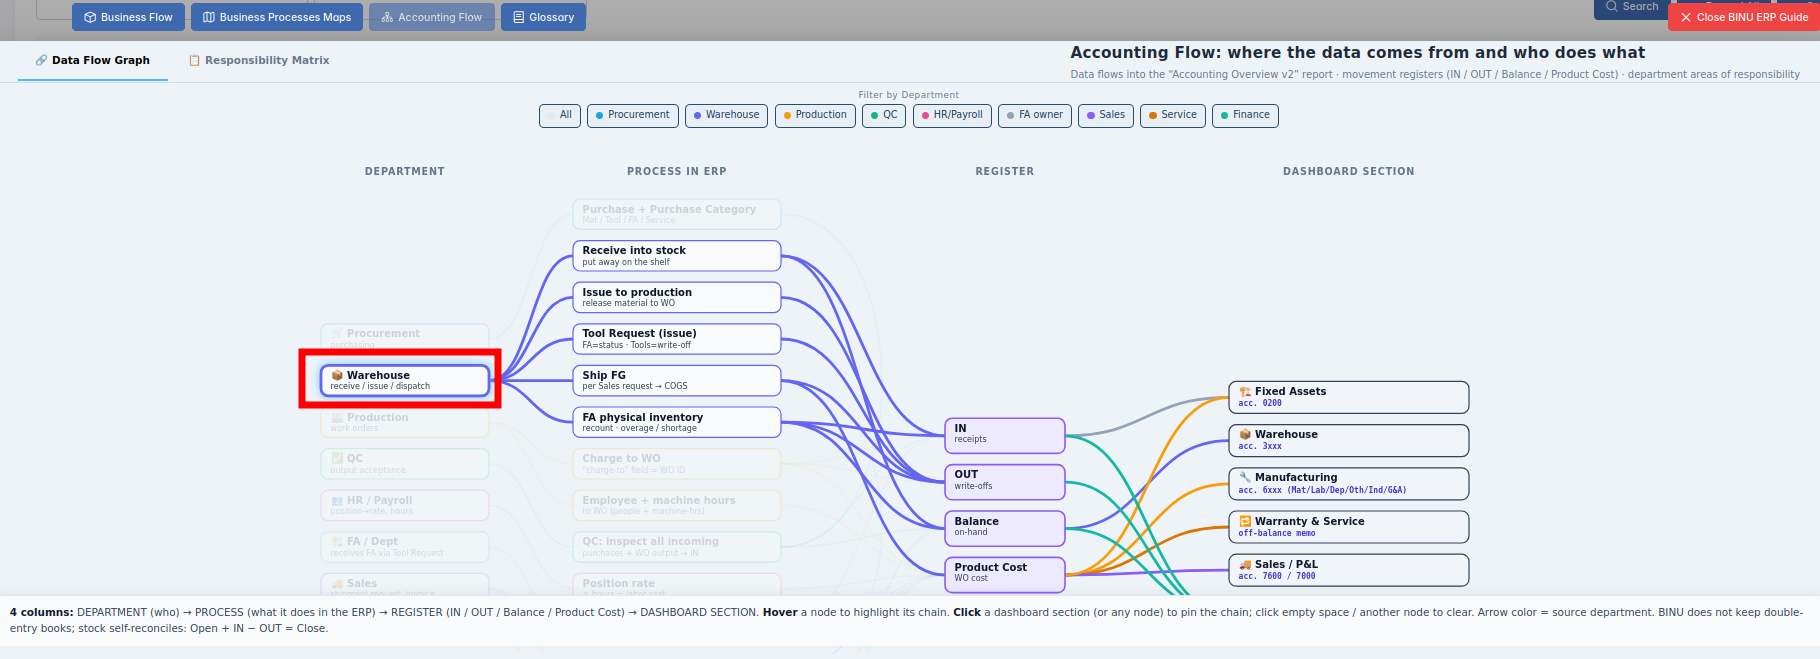
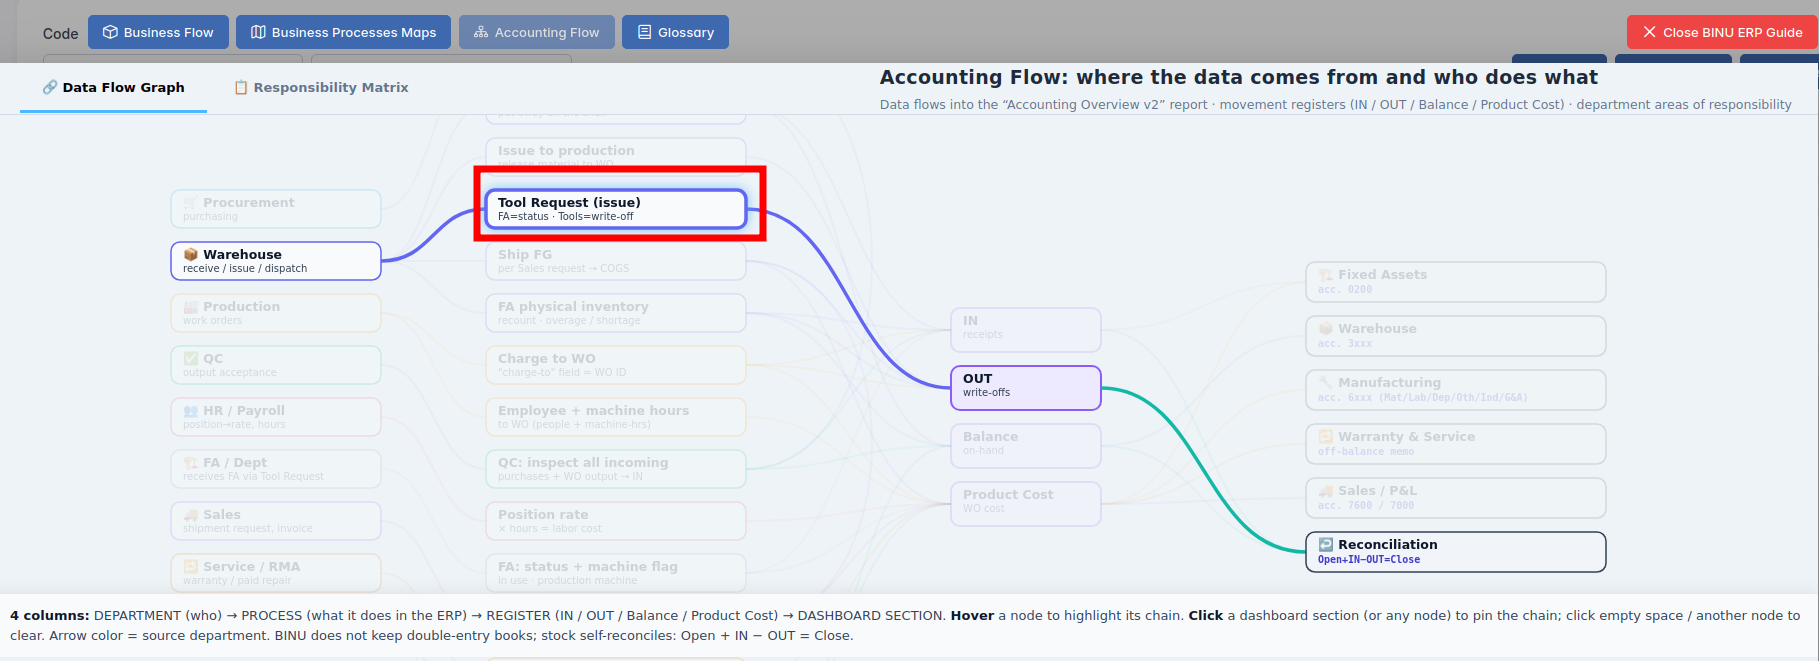
If you click a block in the diagram, you fix the highlighted chain. To narrow the selection further, click a block in the second, third, or fourth column.
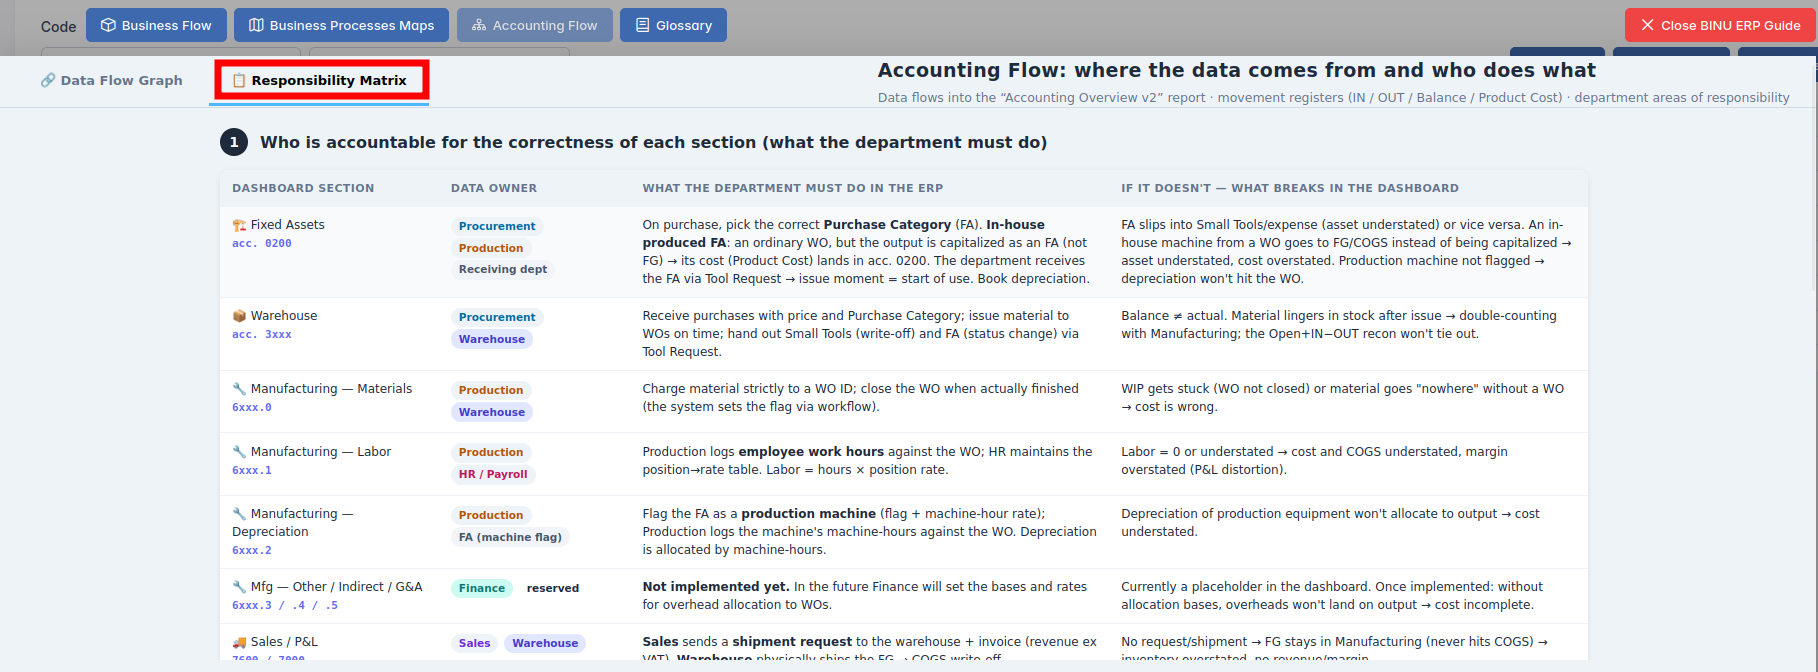
The Responsibility Matrix identifies the department accountable for the selected process.
Glossary
Glossary provides definitions and descriptions of key terms and functionalities used throughout the system. The Glossary can be accessed via the BINU ERP Guide, which is available on any page of the system.
The BINU AI Assistant: Quick Overview
The BINU AI Assistant is specifically designed to help the user with ERP documentation questions. It provides information and assistance related to the BINU ERP system. The BINU AI Assistant understands fifteen (15) languages. It is available on every page as a non-intrusive help tool.
The Purpose of the BINU ERP Guide and BINU AI Assistant Tools
The BINU ERP Guide and BINU AI Assistant help users by:
- Showing where they are within the system (module context and current section).
- Providing a visual schema of the business flow, helping them understand how the current module fits into the larger operational structure.
- Offering a quick-reference instruction panel with the main actions and functions available in the current tab (e.g., creating companies, filtering, scheduling events).
- Offering quick access to the relevant documentation (AI-powered ERP documentation helper).
User List
User List
Navigating the User List Interface
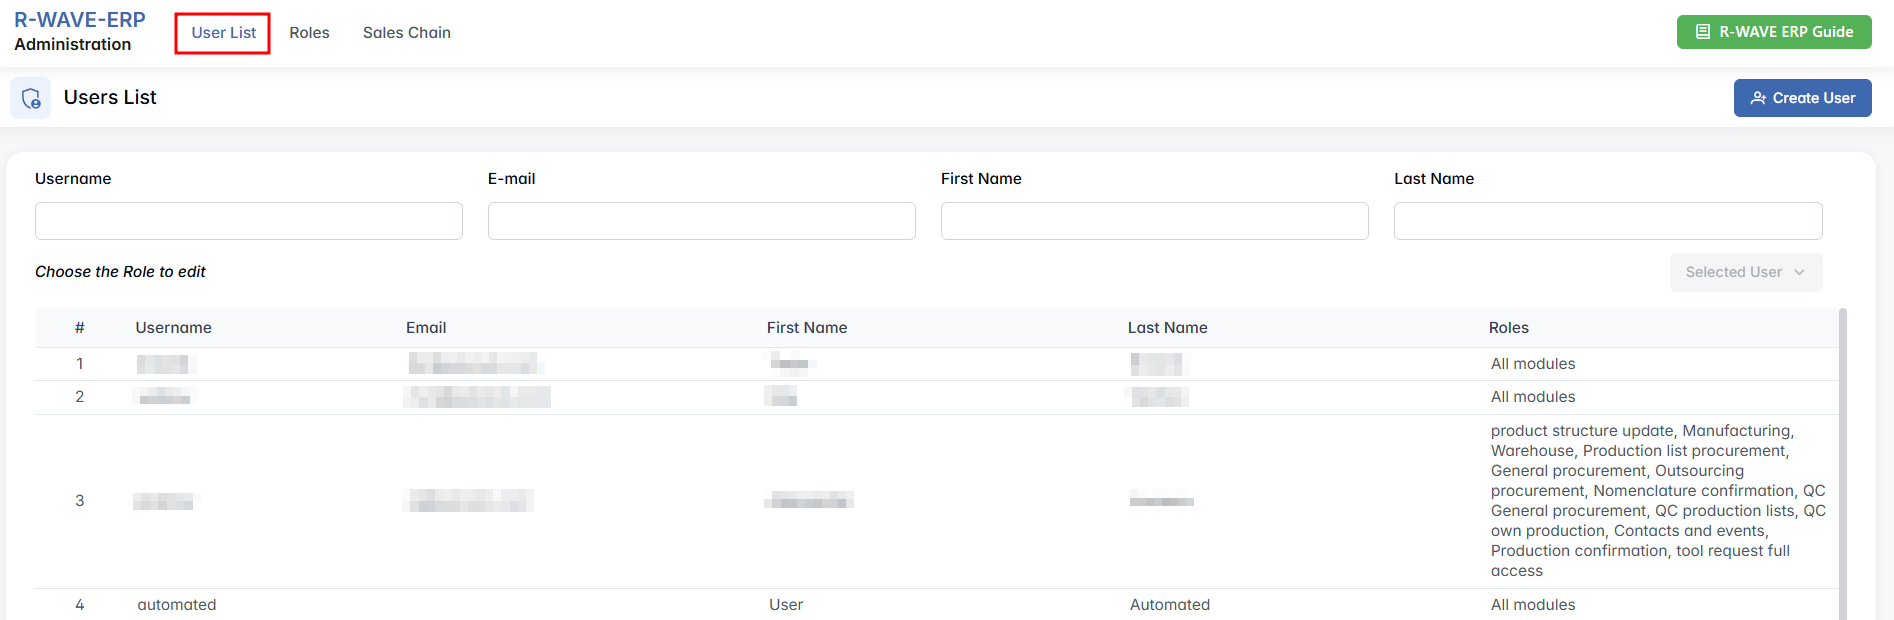
When the module opens, the User List tab is active by default. The layout contains:
- Filter Panel – search users by key fields.
- User Table – displays all users with pagination.
- Action Buttons – for creating, editing, or managing users.
Filtering Users
At the top of the User List tab, there is a filter panel with the following search fields: Username, E-mail, First Name, Last Name.
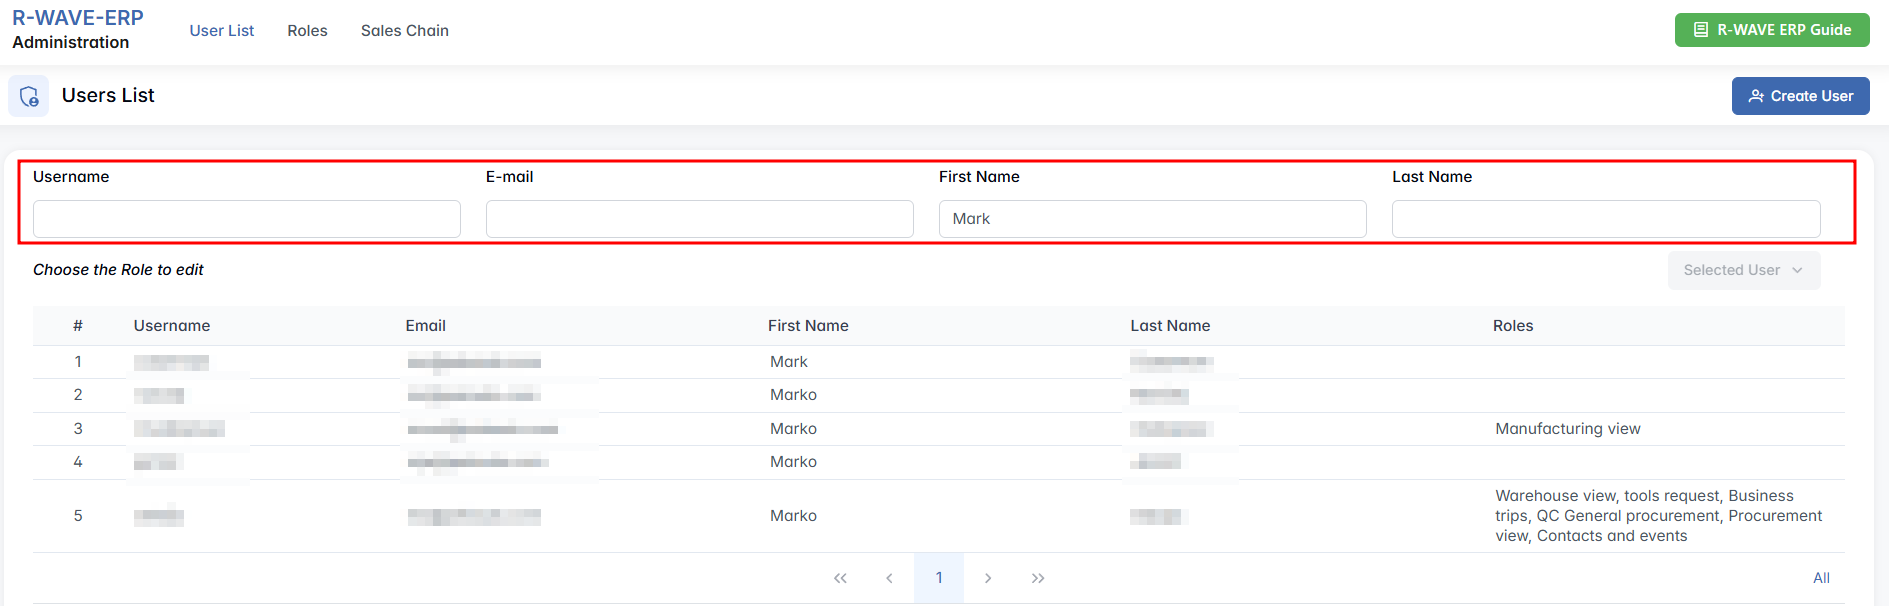
The results update automatically when typing into any field. Multiple filters can be used together (intersection logic), refining the search results instantly.
User Table Overview
The main content area displays a paginated table of users. Each row includes:
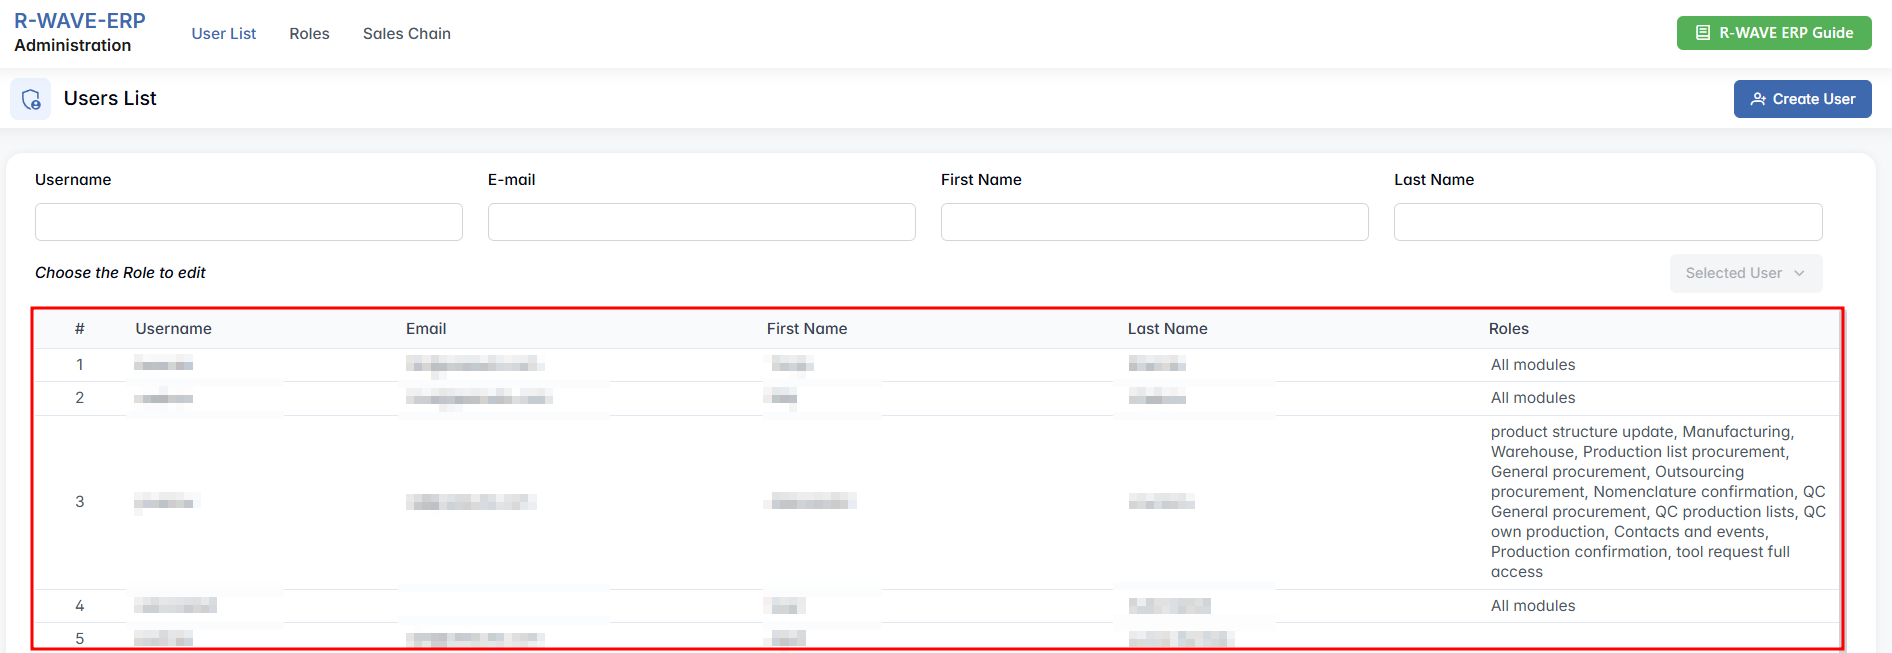
- Username – login name used for system access.
- Email – user's registered email address.
- First Name / Last Name – personal details.
- Roles – assigned role(s) and corresponding access rights.
At the bottom of the table:

Pagination controls allow navigation between pages. All displays all rows on a single page with infinite scroll.
Creating a New User
To create a new user:

- Click the Create User button (upper-right corner).
- A popup window appears with the following fields:
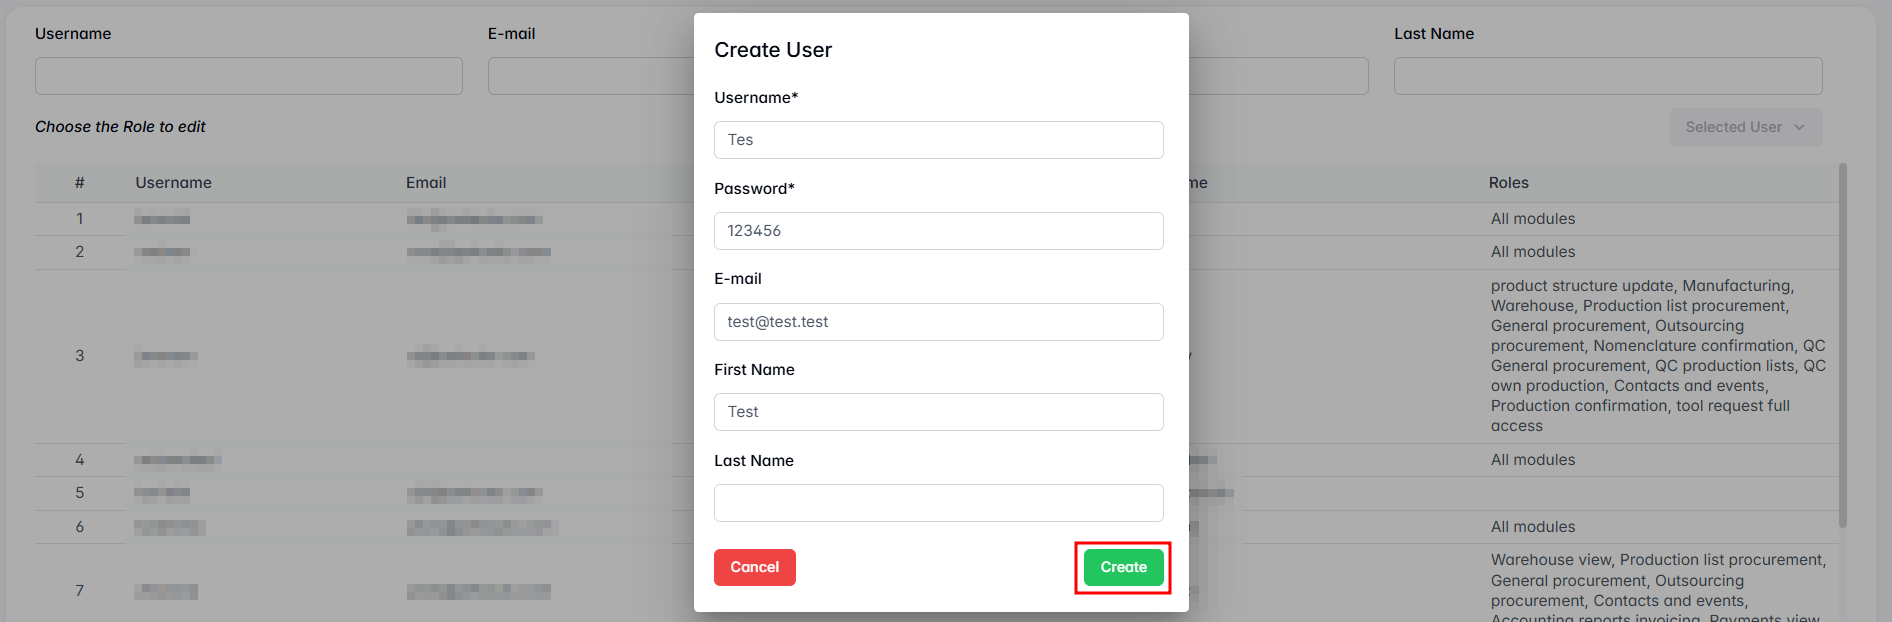
- Username * (mandatory)
- Password * (mandatory)
- First Name
-
Last Name
-
Fill in the details and click Create to save the new user.
The new user will appear in the User List, but permissions must still be configured.

Action Buttons
Editing User
To edit user details, select a user from the table and click Selected User > Edit User.
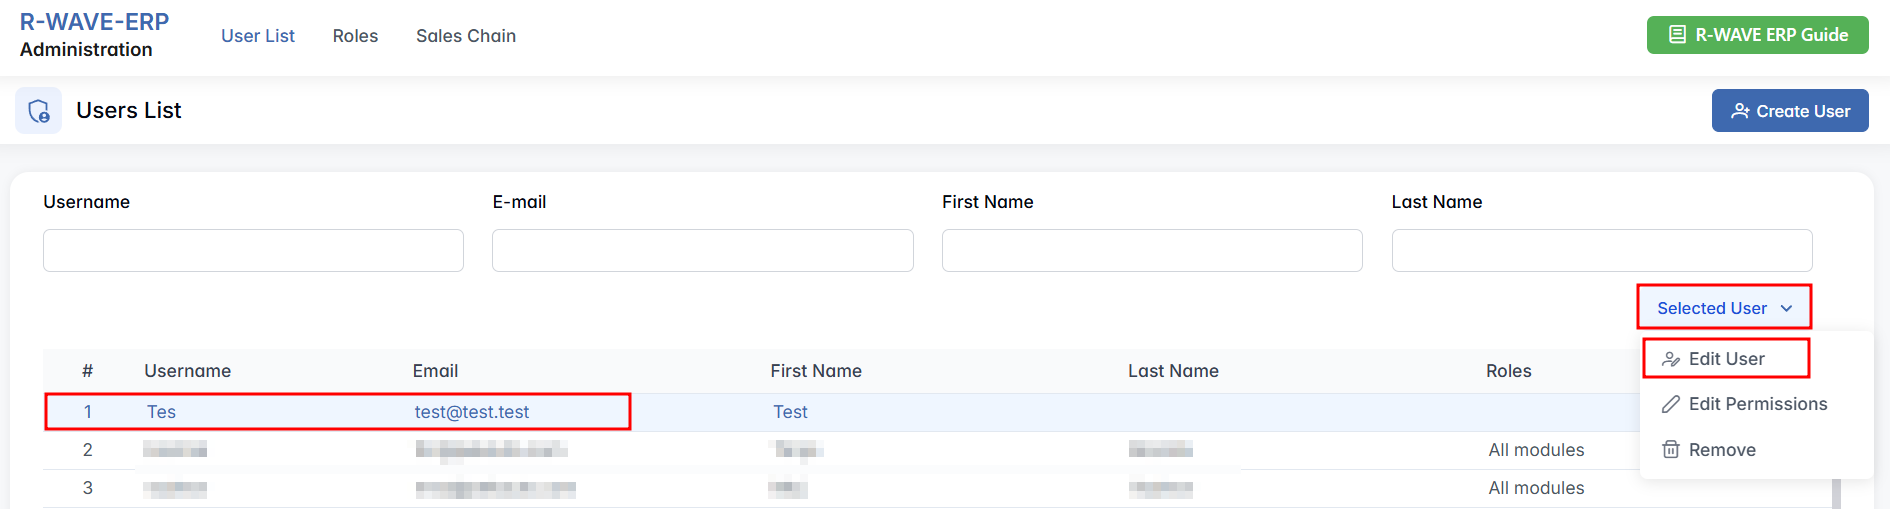
A popup window opens with editable fields: Username, Password, E-mail, First Name, Last Name.
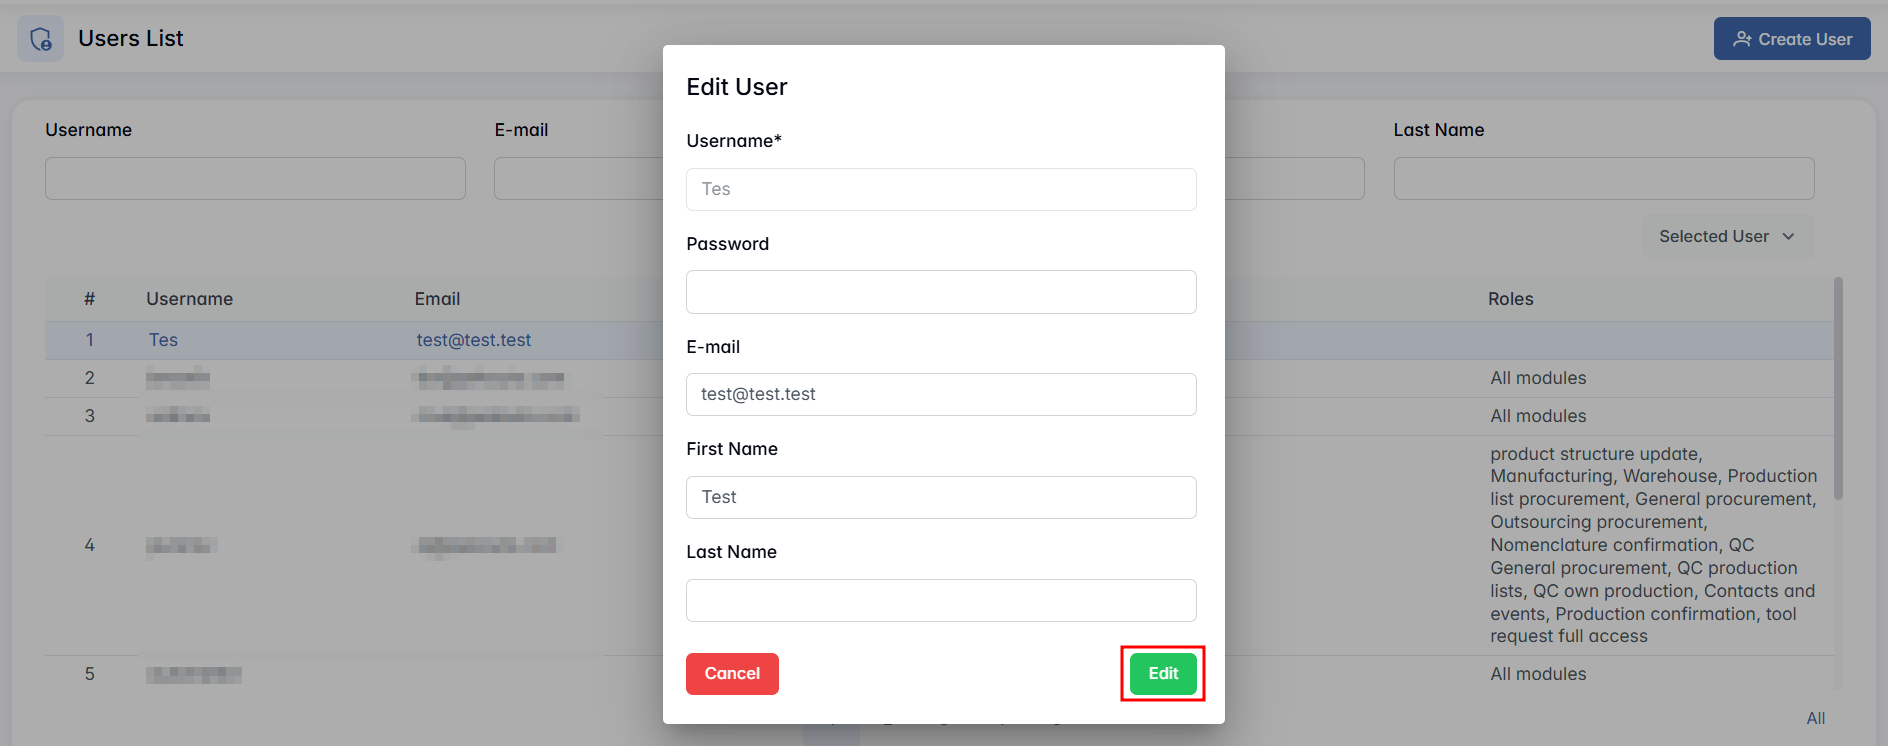
Click Edit to confirm changes.
Managing User Permissions
To configure permissions, select the desired user row in the table and click Selected User > Edit Permissions.
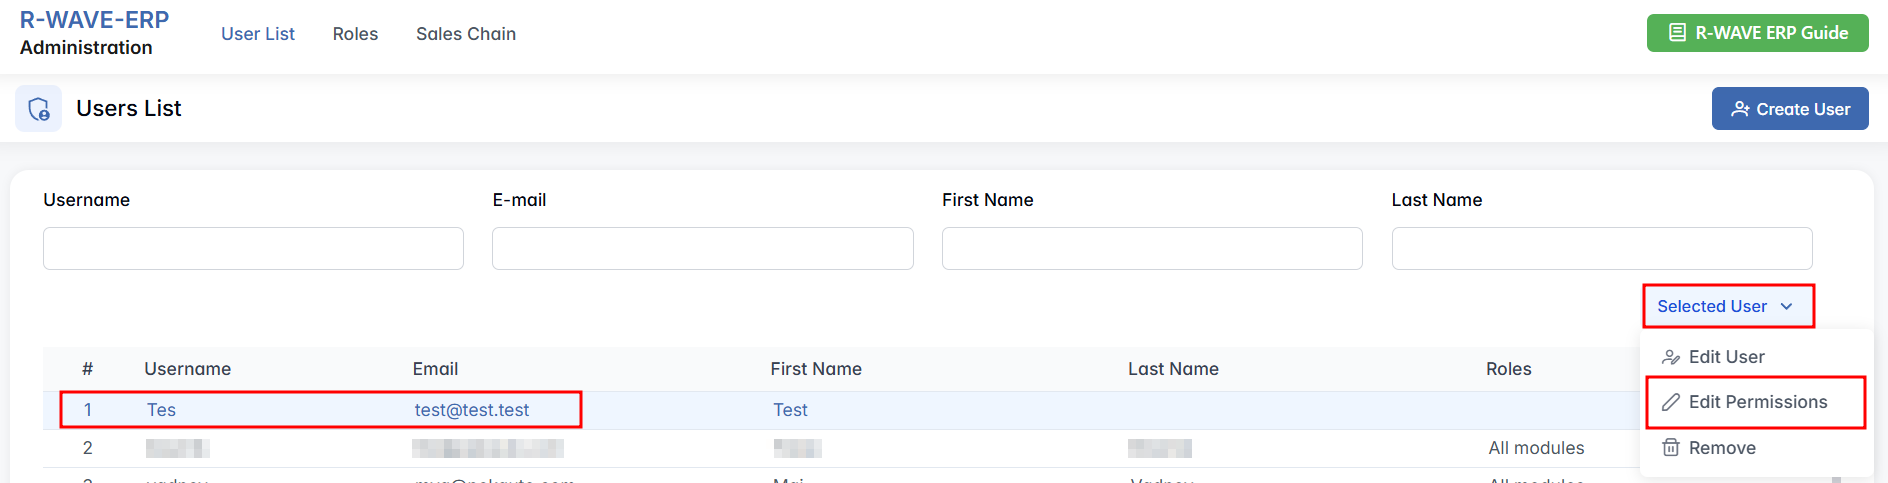
A permission editor window opens, with several sections:
1. Actions and Modules
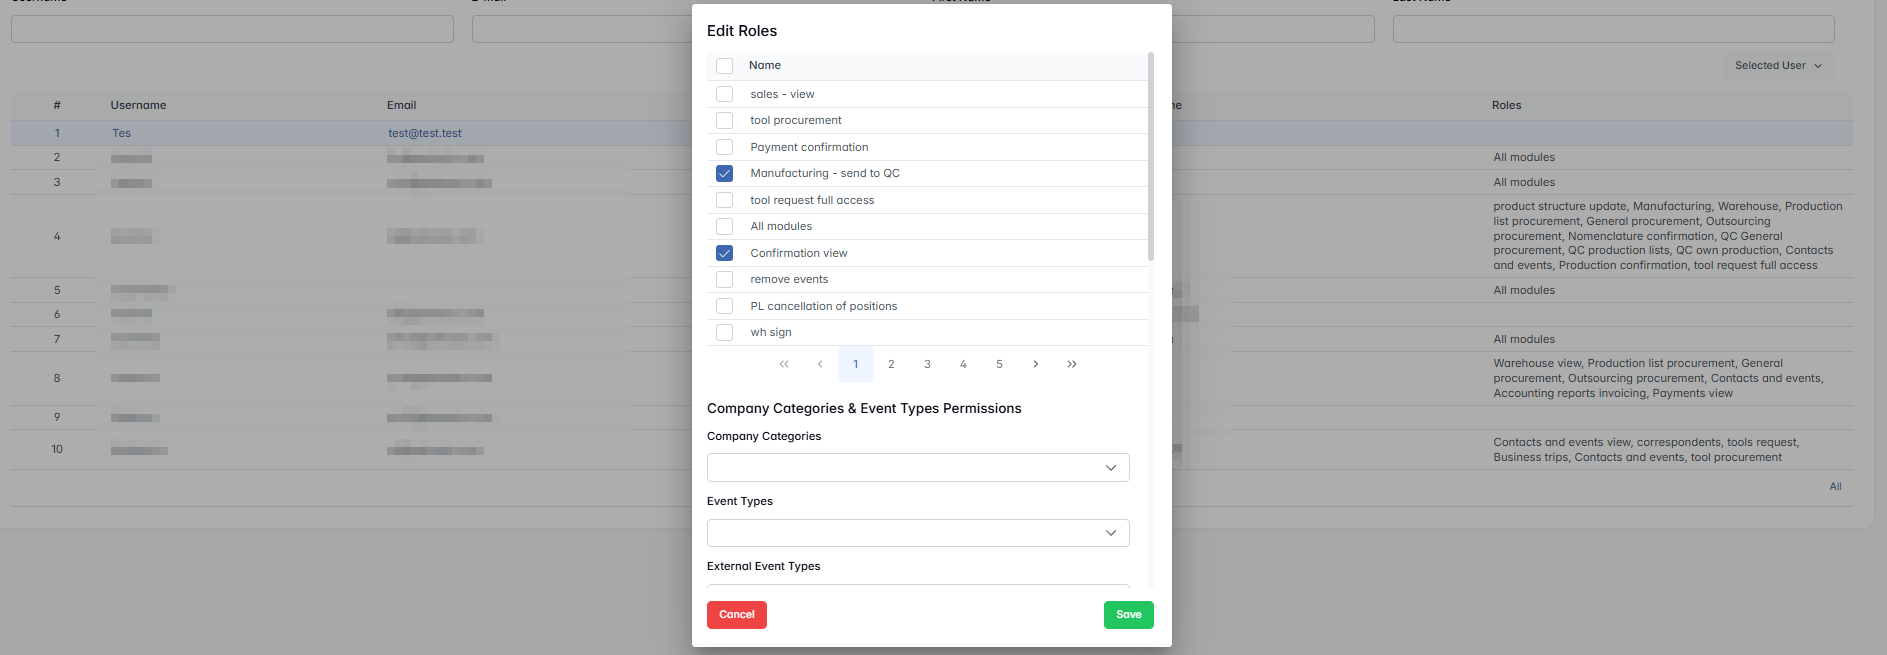
Permissions are displayed as a list of ERP modules and actions (e.g., Sales – view, Tool procurement, QC confirmation). Tick boxes allow enabling/disabling specific rights. All modules grants unrestricted access.
2. Company Categories & Event Types
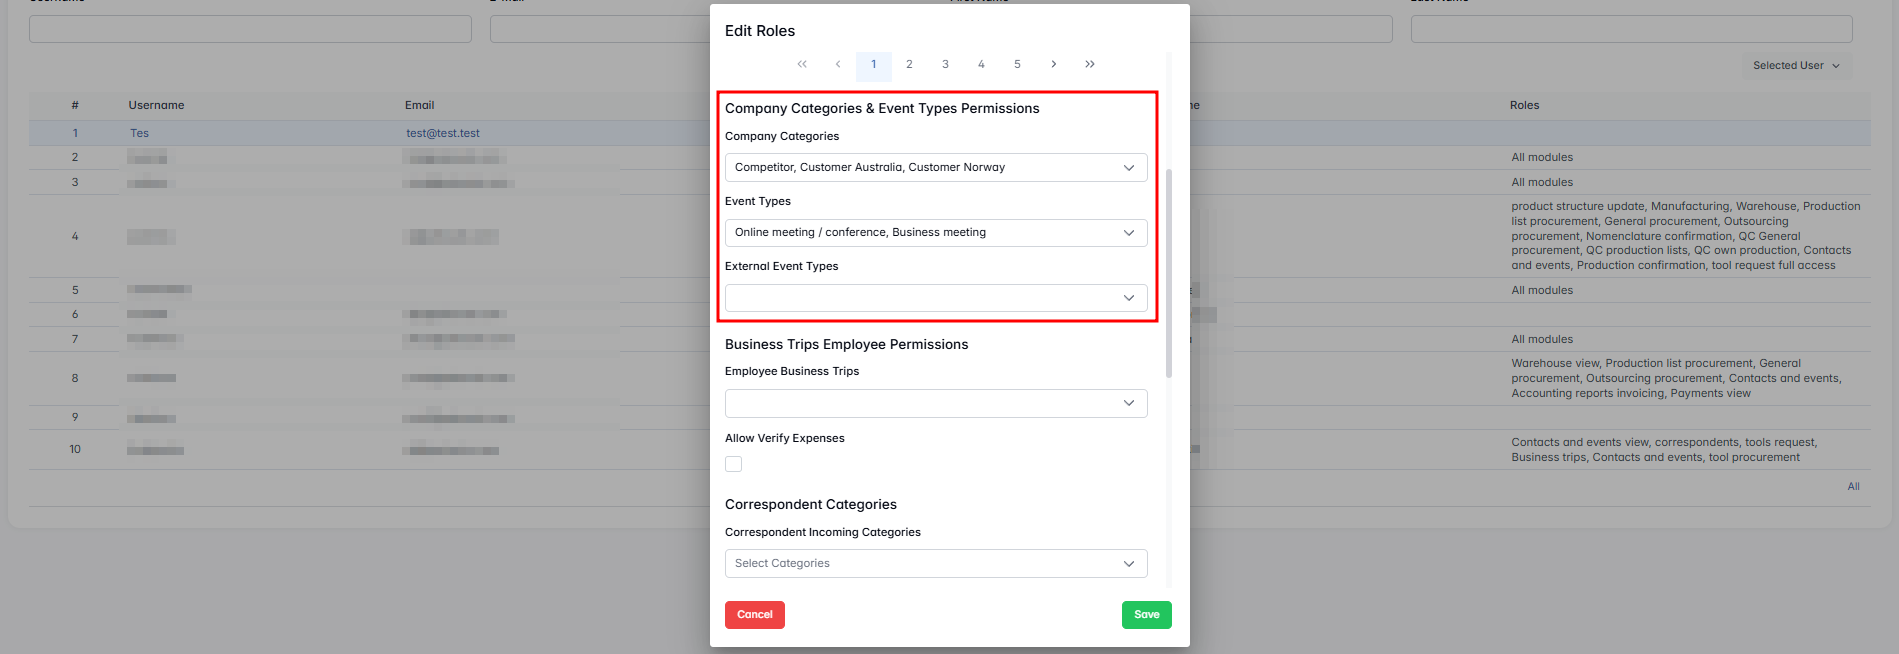
- Company Categories – multiselection of customer or partner categories.
- Event Types – multiselection of allowed event types (e.g., Training/Education).
- External Event Types – integration with Google Calendar. Administrators can register users' calendars so their external events appear in ERP. (See the Contacts and Events guide for details.)
3. Business Trips & Correspondent Permissions
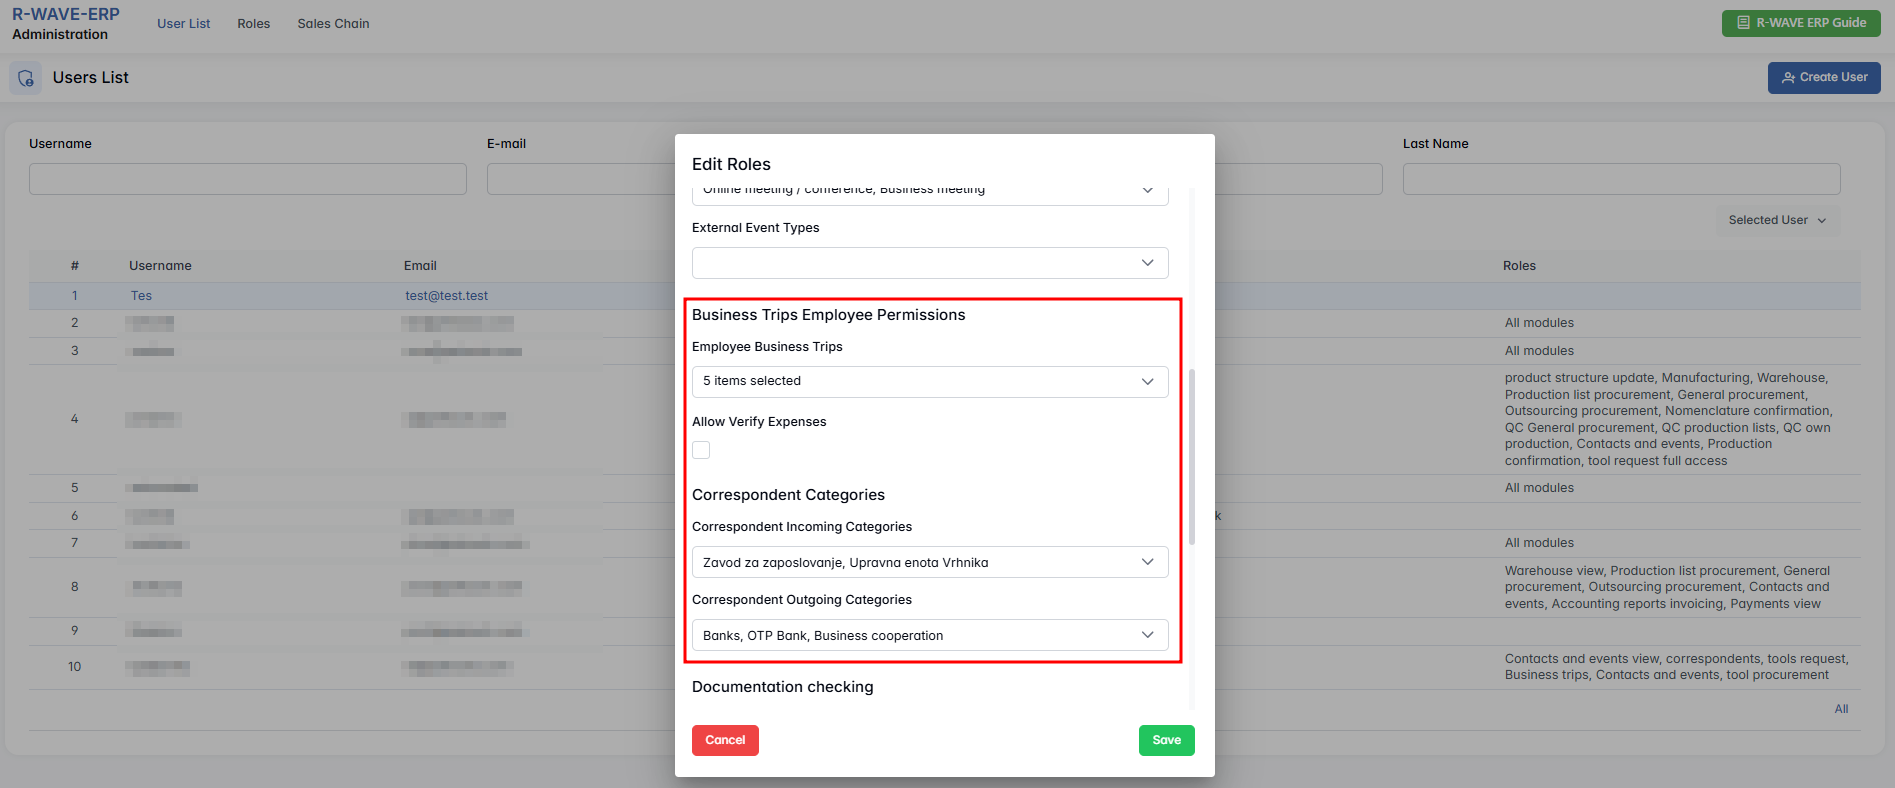
- Assign permissions for managing business trips and verifying expenses.
- Configure allowed correspondent categories (incoming/outgoing).
4. Procurement & Documentation Checking
Control access to Procurement lists, Outsourcing, and General Procurement. Select which purchased categories the user can approve. Options include checkboxes for Production Lists Procurement, General Procurement, and Can Accept Changes On Import.
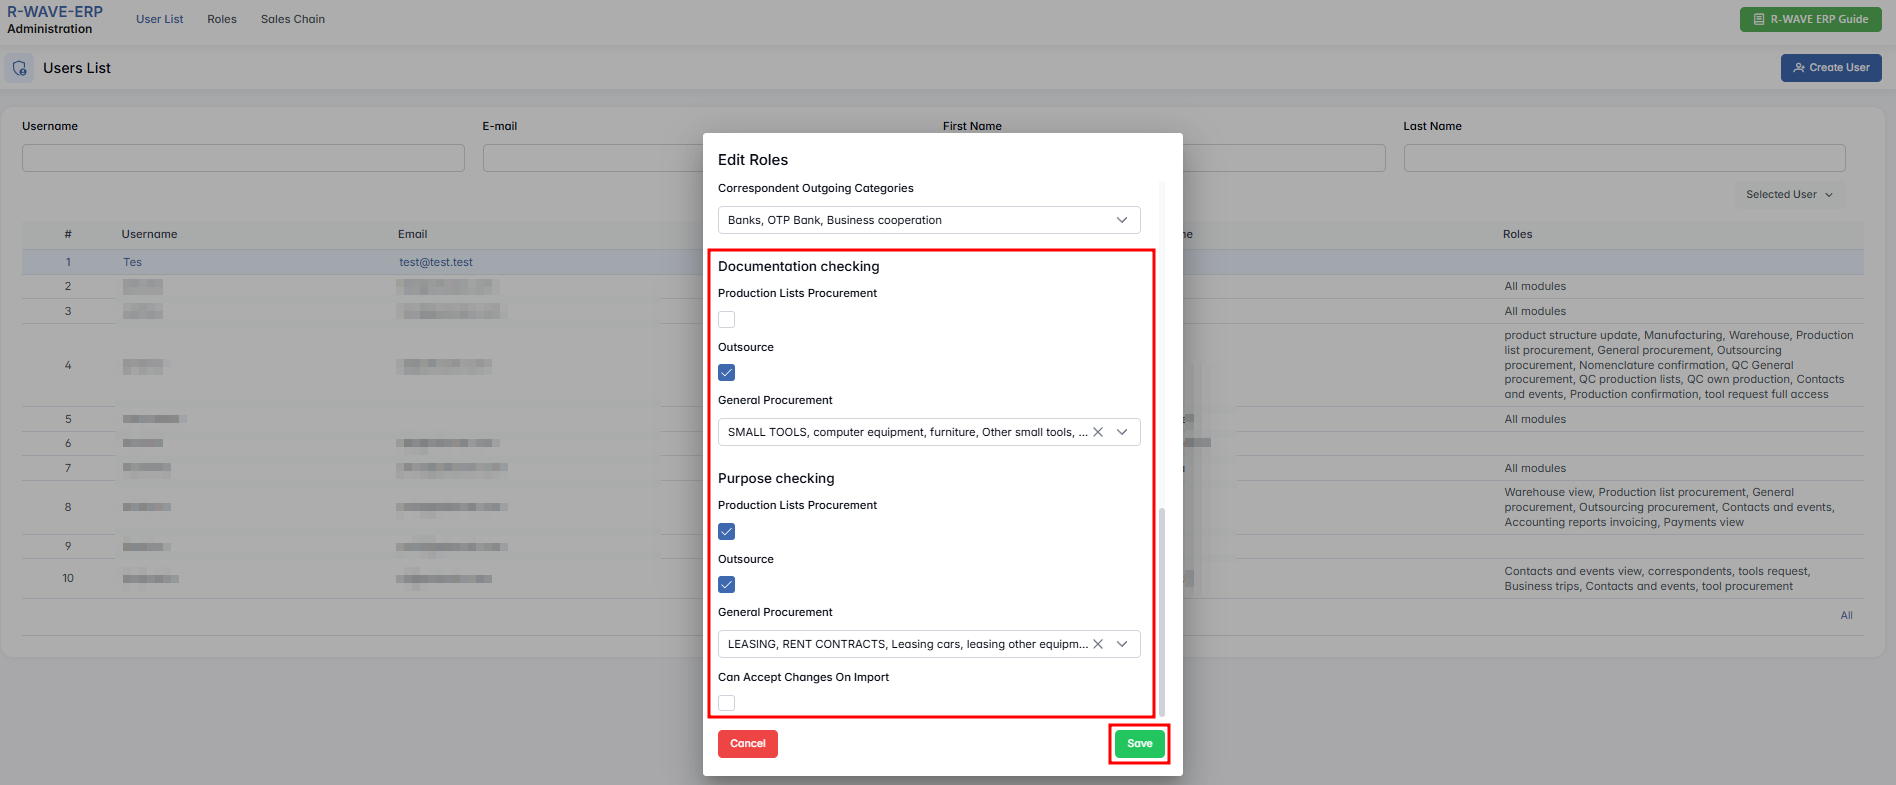
Click Save to confirm permission updates.
Removing a User
To delete a user, select the desired user row in the table and click Selected User > Remove. Confirmation is required.
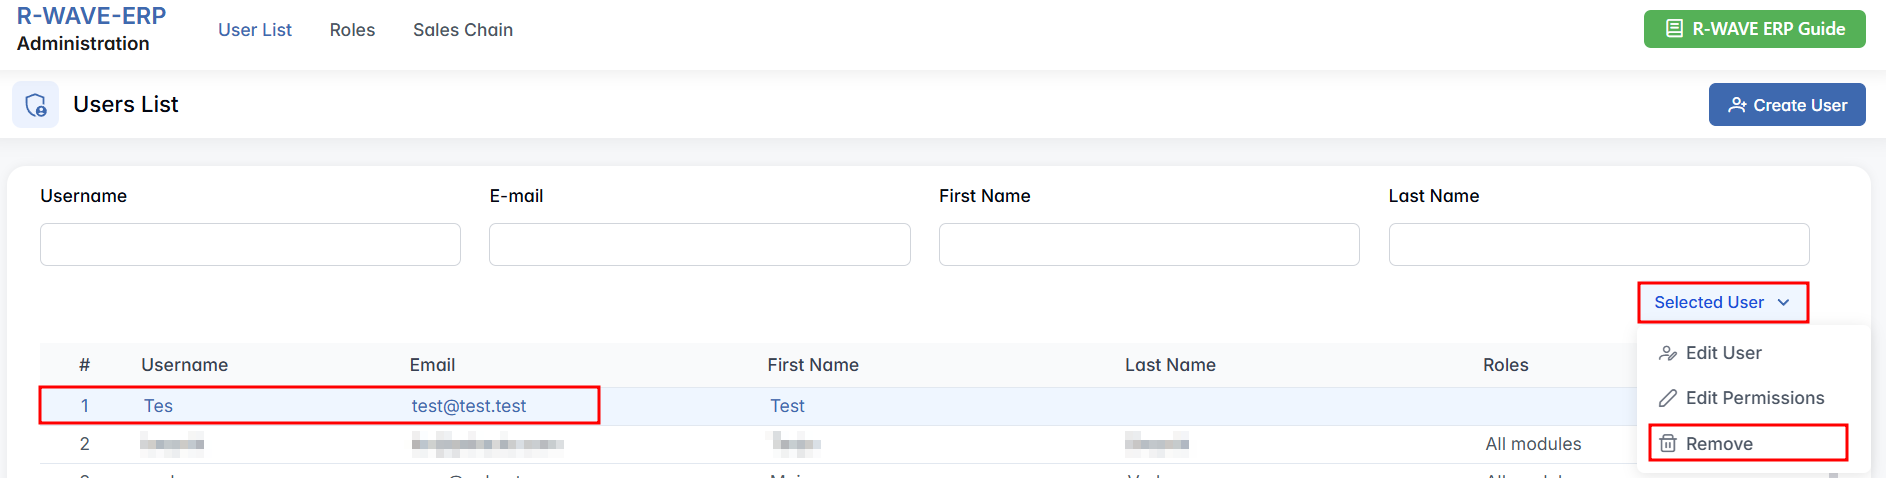
Once deleted, the user loses access permanently.
Roles
Roles
Navigating the Roles Interface

The Roles tab lists all predefined roles in the system. Each role contains permissions that can be assigned to multiple users.
Roles Table Overview
The main content area displays a paginated table of all roles.
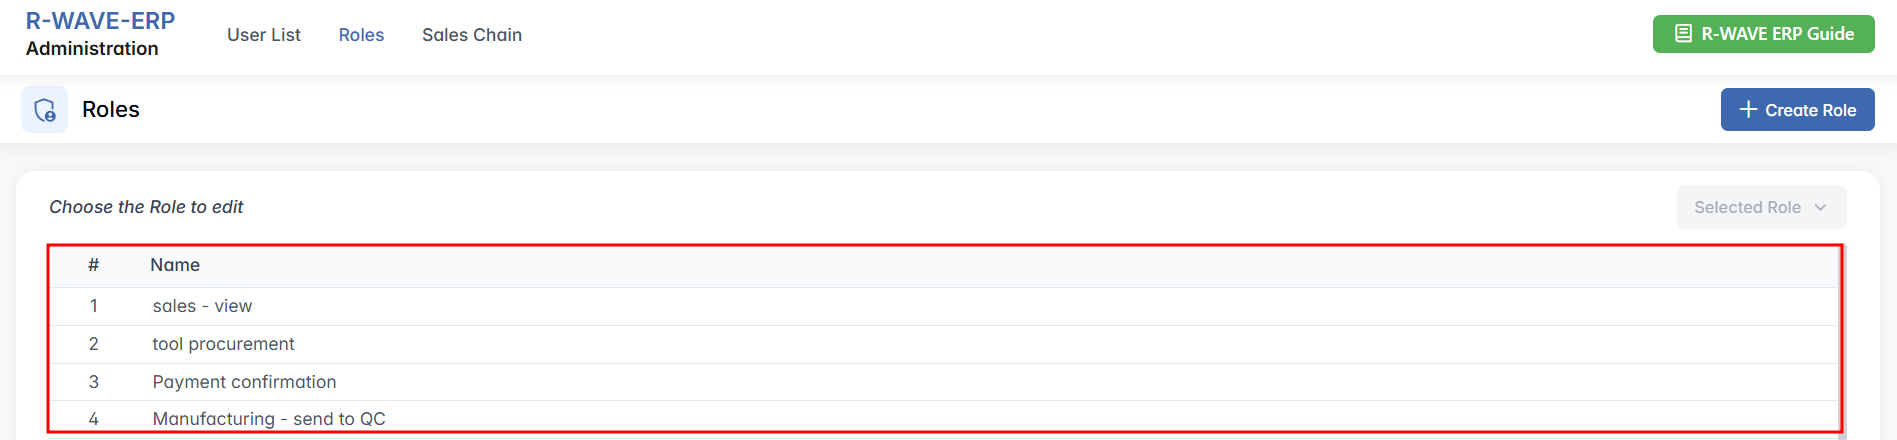

Pagination controls are available at the bottom of the table. Clicking All displays all roles on a single page, allowing continuous scrolling.
Creating a New Role
To create a new role:

- Click the + New Role button in the upper-right corner.
- A popup window appears: Create Role.

-
Name * – enter a descriptive name for the role.
-
Click Create to save the new role.
Once created, the role appears in the table and can be selected for editing its permissions.
Action Buttons
Editing Role
To edit a role, select a role from the table and click Selected Role > Edit Role.
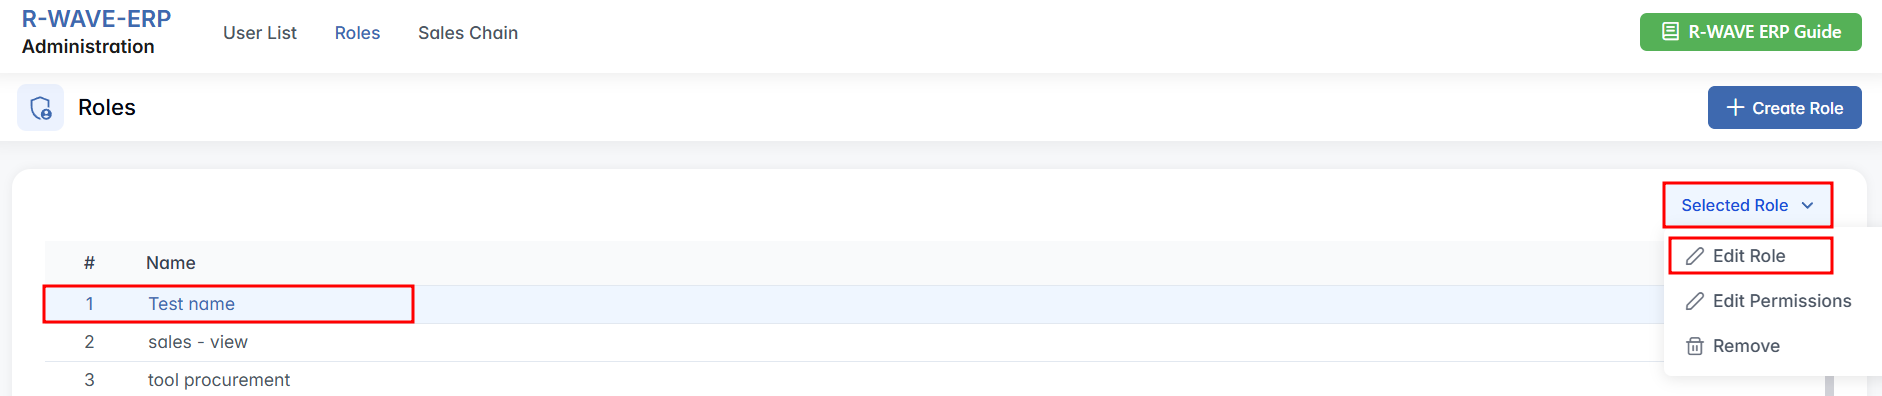
A popup window opens with the editable field Name.

Click Edit to confirm changes.
Managing Role Permissions
- Select the desired role in the Roles table.
- Click Selected Role > Edit Permissions.
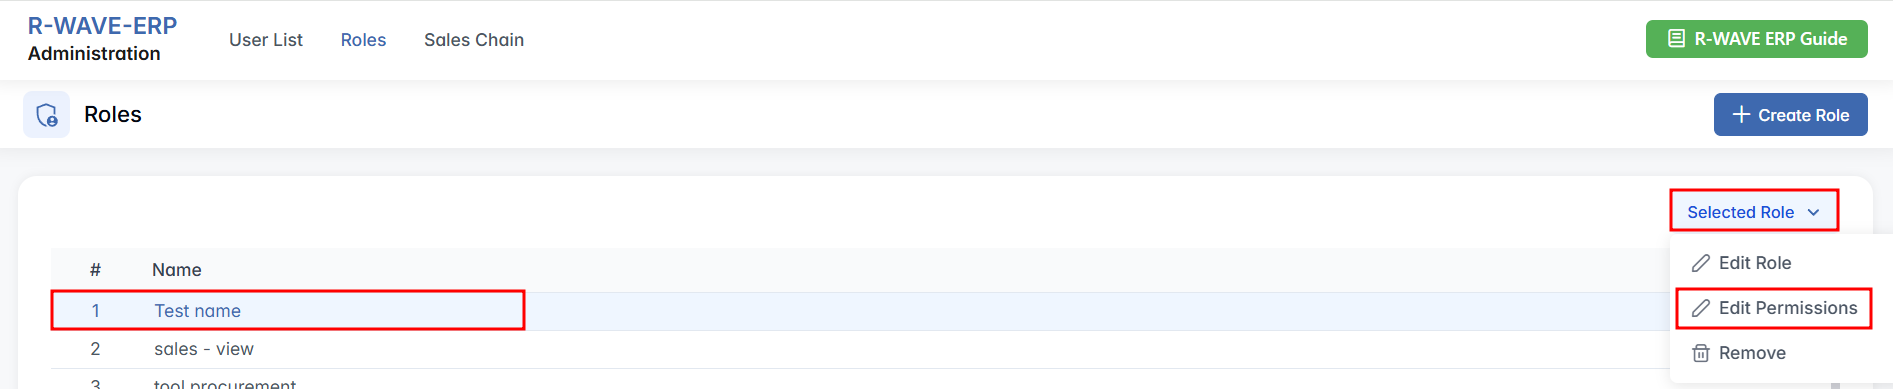
- A permissions editor popup opens, displaying a list of all modules and a brief description of the permissions available in each module.
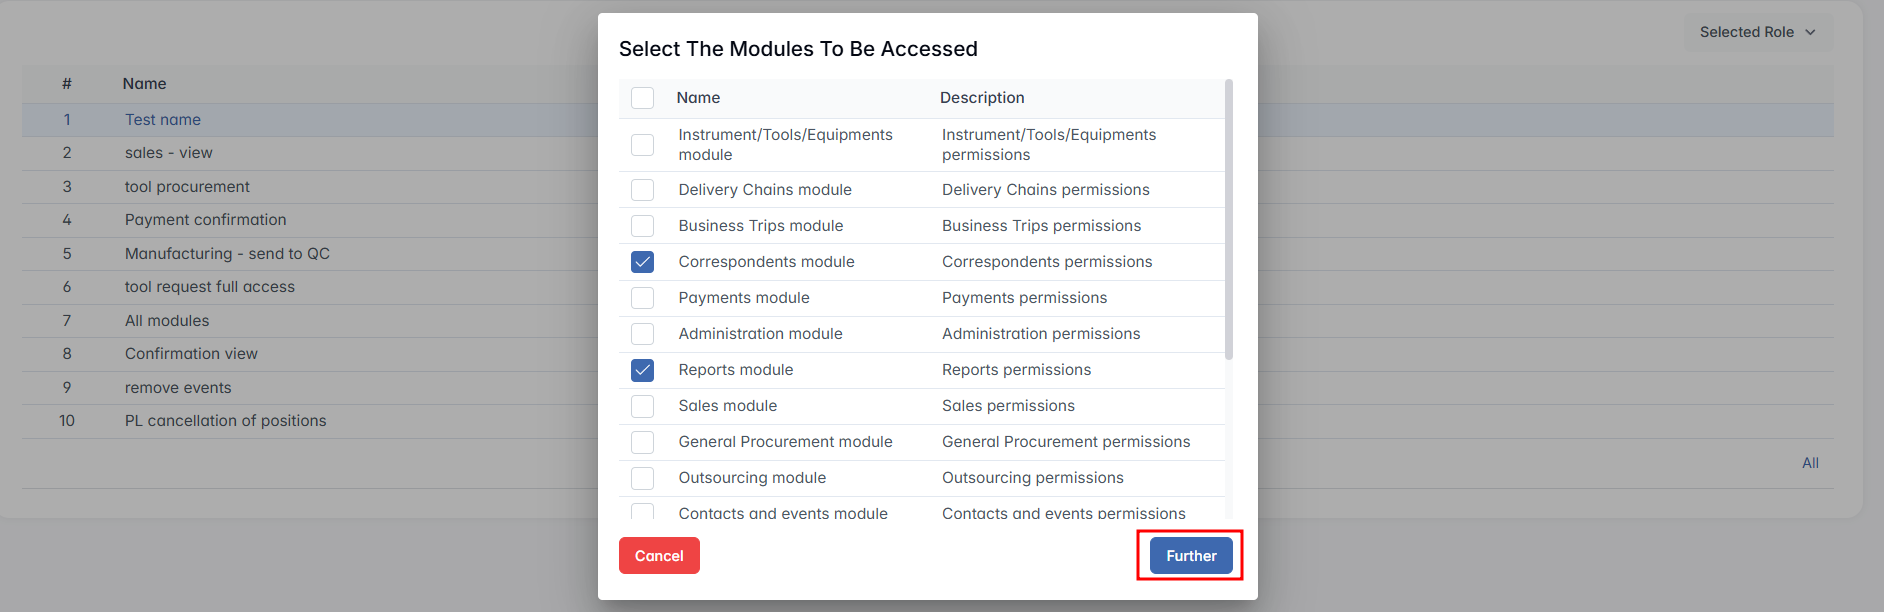
Assigning detailed permissions:
- Click Further to access the detailed permissions of the selected role. A new popup window opens: Edit Permissions of the Role "Role Name". Here, you can select or deselect specific actions and module access rights for this role.
- Once all desired permissions are configured, click Save to confirm and apply the changes.
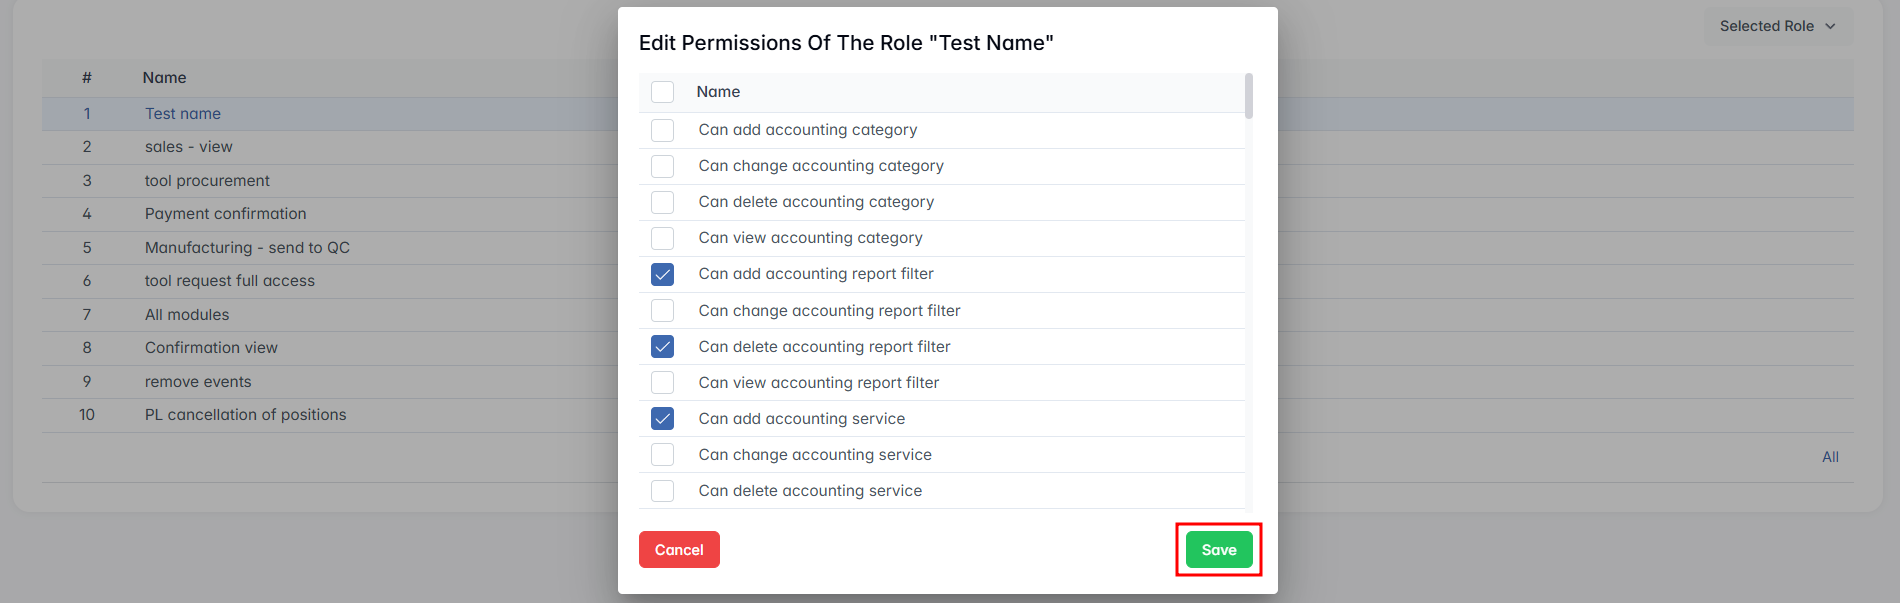
After saving, the role's updated permissions will automatically be available when assigning roles to users in the User List tab.
Removing a Role
To delete a role, select the desired role row in the table and click Selected Role > Remove. Confirmation is required.
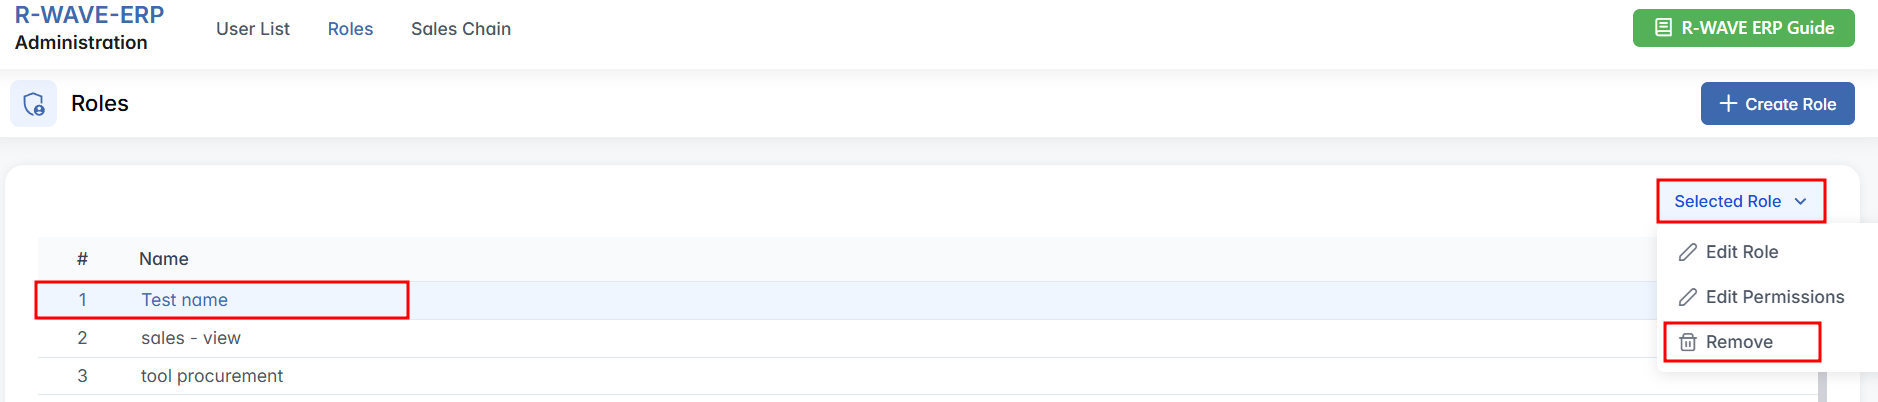
Deleted roles are permanently removed and cannot be recovered.
Sales Chain
Sales Chain
The Sales Chain configuration is managed through a popup window. This popup allows administrators to define which product categories are available when creating a Production List from the Sales Chain menu.
Viewing the Sales Chain Popup

From the Administration module, select Sales Chain to open the configuration window. A popup appears: Sales Chains – "Choose categories for creation of production list from Sales Chain".
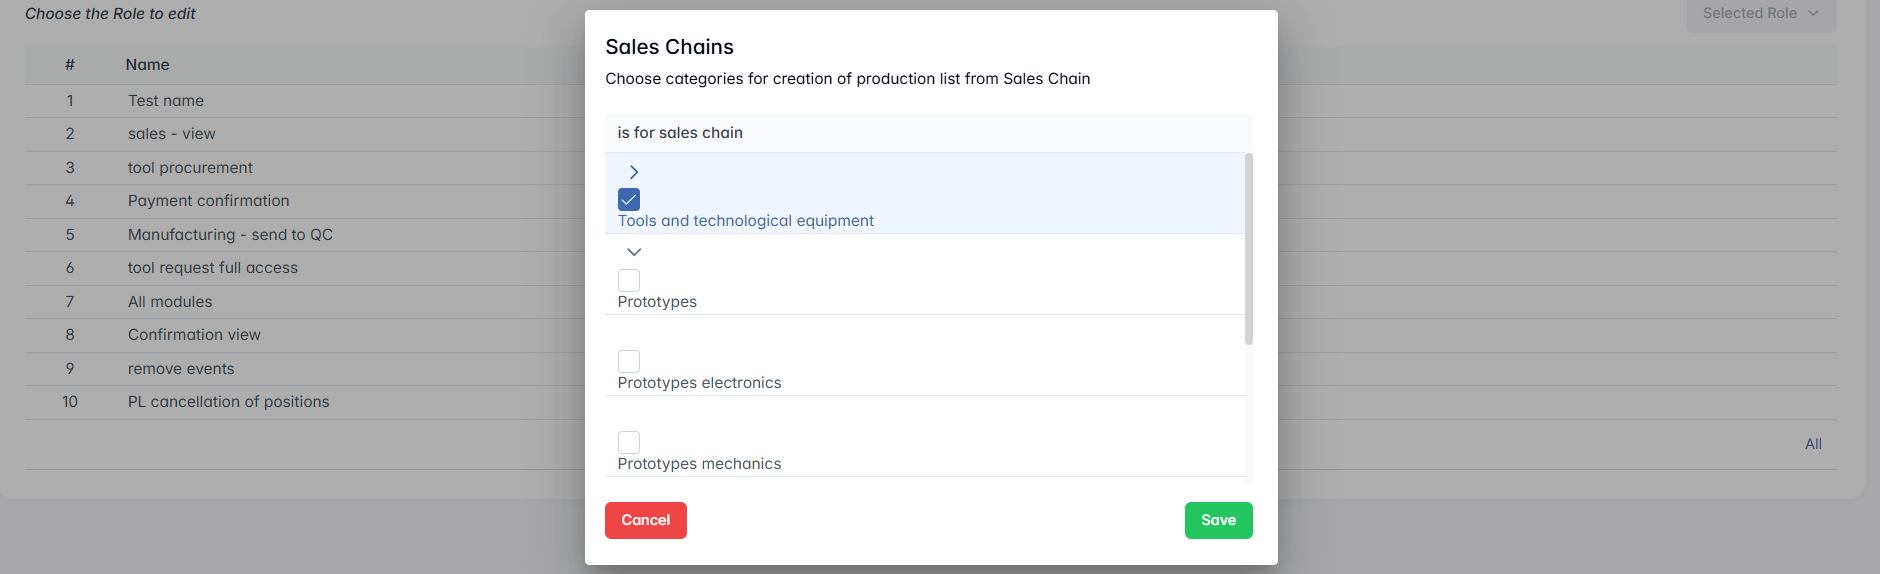
The popup displays a hierarchical tree view of categories with expandable parent nodes and child elements. Each category has a checkbox for selection. Example categories include: Tools and Technological Equipment, Prototypes, Serial, Other.
Within the tree view, you are able to:
- Expand or collapse categories to view subcategories.
- Select or deselect categories by ticking the corresponding checkboxes.
- Combine multiple categories in one selection.
Once the desired categories are selected, click Save to confirm.